
A lens stays sharp and clear with gentle cleaning and the right tools. Dust should come off before any wiping starts, so grit does not scratch the surface. A soft microfiber cloth and a small amount of lens cleaner work best for smudges. These six tips show how to clean safely and keep your coatings in great shape.
Start by Identifying the Lens Surface
The initial thing you should do is identify exactly what part of the lens you’re about to clean, because the front glass, rear glass, and outer barrel don’t all need the same care. That simple pause helps you feel confident and keeps you from treating every area the same whenever it isn’t.
Good lens identification starts with looking closely at shape, coating, and use. The front element often collects fingerprints, while the rear glass needs extra caution because it affects image quality fast.
Next, check the barrel, switches, and rings. These surface materials can include glass, rubber, metal, and plastic, and each responds differently to contact. At the time you know what you’re handling, you protect your gear like someone who truly belongs behind the camera, not someone guessing and hoping.
Blow Dust Off Before Wiping
Before you wipe the lens, use a blower to push off loose dust and grit.
That quick step lifts particles that could drag across the glass and leave fine scratches.
You’ll clean more safely and get better results once you clear debris initially.
Use A Blower
Start with an air blower, because it lets you remove loose dust without touching the lens at all. That initial step helps you care for your gear the way seasoned photographers do, and it keeps your routine safe and simple.
Use short, controlled puffs instead of long blasts, so dust lifts and falls away cleanly. Hold the camera at a slight lens angle, preferably downward, because gravity becomes part of your team.
In case you’re using compressed air, be extra careful and keep the force gentle, since strong pressure can push debris where you don’t want it. Also, never blow with your mouth, because moisture can leave fresh smudges behind.
Starting this way, you protect the glass before any wiping begins, and you build a cleaning habit that feels confident, calm, and professional every time.
Lift Grit First
Once loose dust has shifted with the blower, your next job is to make sure any stubborn grit is fully lifted off the lens before a cloth ever touches the glass. You want every speck gone, because your lens deserves calm, careful handling, just like the gear-loving community you belong to.
- Hold the lens downward so gravity helps particles fall away.
- Use gentle manual dusting with a lens-safe brush to lift what air missed.
- Keep strokes light and controlled, since static electricity can make fine debris cling.
- Separate tools for glass and barrel areas so grime doesn’t travel back.
This step builds trust in your routine. You’re not rushing, and that matters. Through lifting grit initially, you create a cleaner starting point, keep your process steady, and treat your lens with the kind of respect fellow photographers value.
Prevent Surface Scratches
Because even a tiny speck can act like sandpaper, you should blow dust off the lens initially and keep the glass angled downward while you do it. That simple habit helps gravity carry grit away, so you don’t drag it across the surface. Use an air puffer with short bursts, not your breath, since moisture can leave new smudges behind.
If a few particles stay put, reach for a lens brush with ultrasoft bristles and use gentle handling in light circles from the center outward. Keep a separate brush for the barrel and casing, because mixed debris can scratch the glass.
This step works best before any cloth or solution touches the lens. Once you’re done, add protective covers right away, so your gear stays cleaner and you feel ready with the rest of your camera crew.
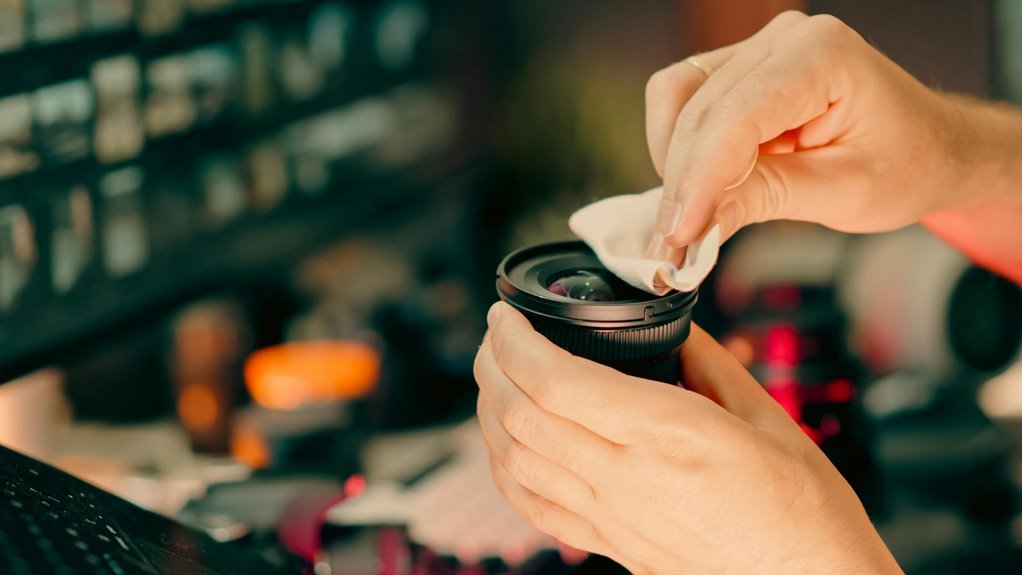
Use a Microfiber Cloth for Lenses
While dust could look harmless, a clean microfiber cloth is what protects your lens any time it’s time to lift away smudges, skin oils, and faint streaks without harming the glass.
If you choose the right cloth types, you give your gear the same care trusted photographers rely on, and that helps you feel part of a careful, capable community.
- Use a lens-only microfiber cloth, so trapped grit doesn’t transfer from other surfaces.
- Fold it into sections, so you always have a fresh area ready.
- Keep track of cleaning frequency, because overhandling can wear coatings and add new marks.
- Store your cloth in a sealed pouch, so it stays as clean as the lens you value.
That simple habit builds confidence, keeps your routine gentle, and helps your images stay clear every time.
Apply Lens Cleaner the Right Way
A clean microfiber cloth does the gentle lifting, and the next step is using lens cleaner with the same care. For safe solution application, place two or three drops on the cloth, not on the lens. That keeps moisture controlled and helps protect the lens housing from unwanted seepage.
Once the cloth is lightly damp, you’re ready to clean with confidence. Keep the camera angled downward so any loosened debris won’t settle back on the glass. Use calm, even wiping techniques, and don’t soak the fabric.
A little cleaner goes a long way, and your lens responds best to patience, not force. Provided that you stay measured and careful here, you’re doing what experienced camera owners do. That small habit helps your gear stay reliable, clear, and ready for the moments you love capturing most.
Remove Fingerprints and Smudges Safely
Now that the cleaner is on the cloth, you can tackle fingerprints and smudges without putting the lens at risk. You’re part of a careful crowd here, and your touch matters.
Fingerprint oils cling to glass, so use light, controlled circles from the center outward. That motion lifts marks while keeping pressure gentle. In case a smudge resists, make another pass instead of pressing harder. This helps remove chemical residues and skin oils without stressing the surface.
- Use only the damp area of your microfiber cloth for the marked spot.
- Keep your hand steady so each pass stays smooth and gentle.
- Work slowly, because patience protects the lens and gets better results.
- Check the glass in good light so your camera feels ready for the group’s next shared shot.
Prevent Streaks and Cleaning Damage
Because even a clean lens can end up with streaks in case you use too much moisture or pressure, your next step is to finish the job with a light hand and a dry, clean microfiber cloth. Use gentle circular passes from the center outward, and switch to a fresh area of the cloth as soon as it feels damp. That simple habit helps your gear stay clear and cared for.
Just as crucial, don’t spray solution on the lens itself. Add only a few drops to the cloth, then wipe softly so moisture can’t creep into the housing.
Keep your cleaning frequency low and smart, not constant, because overcleaning can wear coatings over time. Let environmental factors guide you. Dusty trails, salty air, and humid rooms might call for extra care. You’re protecting your lens like someone who truly belongs behind camera.
Frequently Asked Questions
How Often Should I Clean My Camera Lens?
Clean your camera lens when you notice dust, fingerprints, or smudges affecting the glass. Check it often as part of your routine, and schedule a more thorough cleaning when buildup becomes noticeable. This keeps your equipment in good condition and helps maintain clear shots.
Can Household Glass Cleaners Damage Lens Coatings?
Yes. Household glass cleaners can react with lens coatings and weaken or strip them over time. Use a cleaner made for lenses instead so your optics stay clear and protected.
Is It Safe to Clean Lenses While Traveling Outdoors?
You can clean lenses safely outdoors if you use compact cleaning tools and watch for blowing dust, damp air, and grit. Start by removing loose particles with a blower, then clean the surface gently with a microfiber cloth to reduce the chance of scratches.
What Should I Do if Fungus Appears Inside the Lens?
If you notice fungus inside your lens, stop using it and have it checked by a qualified camera repair specialist as soon as possible. To help prevent it, keep your equipment in a dry, well ventilated, and clean place.
When Should I Replace a Worn Microfiber Cloth?
Replace your microfiber cloth when the fibers lose softness, the edges start to fray, or the cloth begins leaving streaks behind. A fresh cloth helps prevent scratches, and disposing of worn ones properly helps keep your cleaning kit reliable.
