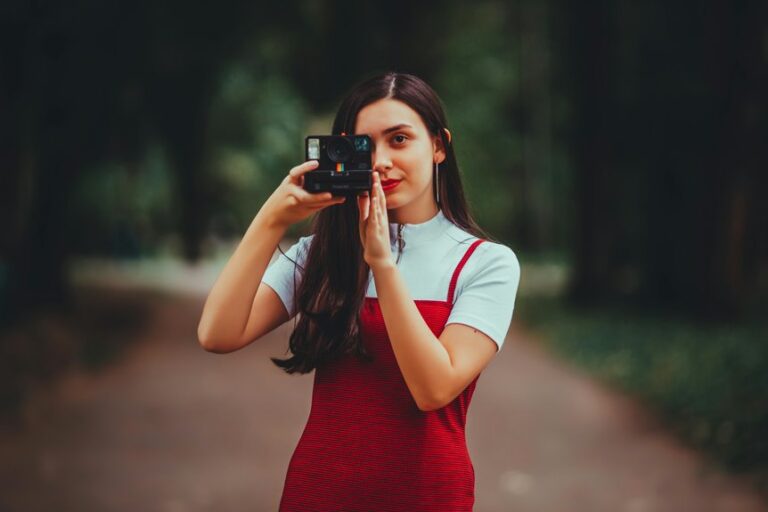
Natural light can make photos look soft, rich, and full of life. You can use it well by watching where it falls, how strong it is, and how it changes through the day. Window light, golden hour, shade, backlight, and reflectors each give a different look. Once these basics click, your photos start to feel more natural and more intentional.
How to Spot Good Natural Light
How do you know at what point natural light is working for you instead of against you? You start with watching faces, not just brightness. Good light feels welcoming. It shapes cheeks gently, keeps eyes clear, and avoids heavy darkness under brows. You can spot it once shadow patterns look calm and natural, not busy or blotchy.
Next, notice where the light comes from. Whenever it arrives from one clear direction, your subject stands out and still feels part of the scene. Look for soft shifts between highlight and shade, because those create depth without making anyone look harsh.
Open shade, nearby walls, and light bouncing off pavement can all help. Provided the light lets skin look even, textures stay real, and expressions feel easy, you’ve found the kind of light people relax into together.
Adjust Exposure for Changing Natural Light
Once you can spot light that flatters a face, the next step is keeping your exposure steady as that light shifts from minute to minute. Clouds move, the sun drops, and bright pavement can fool your camera, so you need to stay in charge.
Start with manual metering so you decide what matters most on your subject. Check your histogram often, then adjust shutter speed, aperture, or ISO in small steps. Should the scene keep changing, consider regarding dynamic exposure instead of one perfect setting.
Re-meter when your subject turns, when the background brightens, or when golden hour deepens. This keeps skin tones consistent and helps your photos feel like they belong together.
With practice, you’ll trust your eye, stay calm, and adapt fast, even as the light plays tricks.
Use Window Light for Soft Portraits
Should the light outside turns harsh or unpredictable, window light gives you a calm, reliable way to make soft portraits that still feel rich and alive. You can place your subject beside the glass, then turn them slightly until directional softness shapes the face with gentle depth.
In case the light feels too bright, add sheer curtains for easy window diffusion and smoother skin tones. This setup helps you create portraits that feel warm, honest, and welcoming, like your subject truly belongs in the frame.
- Face the window for even light
- Turn sideways for soft sculpting
- Use curtains to soften highlights
- Step back to reduce contrast
- Watch catchlights bring eyes to life
As you work, notice how small shifts change mood. You don’t need fancy gear, just care, patience, and attention.
Shoot in Golden Hour Light
You’ll get the richest warm tones and that soft glow once you shoot about an hour after sunrise or before sunset.
At this time, the lower sun wraps your subject in flattering light and cuts the harsh shadows that midday often creates. Should you time it well, you can make your photos feel warmer, calmer, and more alive right from the start.
Warm Tones And Glow
As the day starts to soften, golden hour gives your photos a warm glow that feels gentle, rich, and deeply flattering. You’ll notice softer skin, smoother shadows, and a welcoming mood that helps people feel seen and connected.
Because the lower sun shifts color temperature, your images gain cozy warmth without looking forced. Should you want a little extra harmony, warm filters can gently support that feeling.
- Let warm light wrap faces with kindness
- Use side light to shape cheeks and add depth
- Keep backgrounds glowing to match your subject
- Let rim light outline hair with a soft halo
- Use nearby walls or pavement to bounce warmth back
This light feels honest and inviting. It helps your photos carry emotion, closeness, and that quiet sense that everyone belongs in the frame together.
Best Timing Tips
Golden hour works its magic because timing does most of the heavy lifting. You’ll get the best results about an hour after sunrise or before sunset, at the time the sun sits lower and wraps your subject in soft, warm light. That angle smooths shadows, brightens faces evenly, and helps your photos feel welcoming and connected.
Because of that, you can sidestep many midday challenges, like harsh eye shadows, bright foreheads, and uneven backgrounds. You’ll also notice more depth in the moment you place the sun slightly to the side, which adds shape without making anyone squint.
Keep an eye on seasonal variations, too. In summer, golden hour can be short and late. In winter, it arrives earlier and often lasts longer, giving you more room to settle in.
Use Backlight to Add Depth
At the time you place the sun behind your subject, you create a rim of light that helps them stand out and adds real depth to the frame.
You can keep that glow beautiful, not messy, through shifting your angle and using your subject to block part of the sun. As you work, you’ll see how a small change in position can shape lens flare and give your photo a richer, more polished look.
Rim Light Effects
Because backlight outlines your subject instead of flattening it, rim light adds clean depth and a subtle glow that makes portraits feel more alive. At the time you use rim lighting well, you help your subject stand out in a way that feels warm, natural, and inviting.
To make those edge highlights work for you, place the sun just behind your subject and watch how the outline forms around hair, shoulders, and clothing. Then adjust your angle so the light stays crisp, not scattered.
This approach works especially well during golden hour, during which the lower sun gives you softer shifts and a more flattering glow. You don’t need a complex setup. You just need intention and a little movement.
- Place the sun behind
- Watch hair glow
- Shift your angle
- Use golden hour
- Keep outlines clean
Control Lens Flare
Lean into the sun, and you’ll see lens flare turn from a mistake into a tool that adds depth and feeling to your photo. Whenever you place your subject near the edge of the sun, you soften the backlight and keep their features clear. That balance helps you create images that feel warm, inviting, and full of life.
Next, pay attention to aperture settings, because they shape the look of your flare. A smaller aperture can create sharper flare shapes and even a starburst effect, while a wider aperture gives you a softer, hazier glow.
Then adjust your angle through inches, not feet. Tiny moves change everything. Use your hand, lens hood, or your subject’s body to block part of the sun. You’ll gain control, keep detail, and make the light feel beautifully intentional.
Diffuse Harsh Natural Light Outdoors
Although harsh sunlight can feel impossible to control, you can soften it outdoors through moving your subject into open shade and shaping the light around them. Whenever you place them under a tree, beside a building, or inside a gap between walls, you create softer light and soft shadows that feel welcoming, natural, and flattering.
That simple shift helps your photos look calmer and more connected.
- Choose open shade with clear light from one side
- Check the background for bright patches or dappled light
- Turn your subject toward the brightest open part of the sky
- Avoid leafy shade that adds green color casts to skin
- Use nearby walls or tree lines to form a light-controlled space
With this approach, you stay in control, and your subject feels comfortable, included, and seen too.
Bounce Natural Light With a Reflector
Next, you can brighten things up with a reflector and guide natural light exactly where you need it. Whenever your subject stands in side light or open shade, a reflector lifts the shadow side of the face without flattening shape. That keeps depth while adding clean detail your group will notice.
Start with smart reflector positioning. Place it opposite the sun, then tilt until soft light reaches the eyes, cheeks, and jaw. Small moves change everything, so adjust slowly.
Also consider surface selection. White gives gentle fill, silver adds punch, and nearby walls, pavement, or dry grass can help in case you want a natural bounce. In case you’re near a window, a white V-flat can bounce soft fill and hold a pleasing 2:1 ratio with subtle, friendly shadows.
Frequently Asked Questions
Can Weather Apps Help Predict the Best Natural Light Conditions?
Yes, weather apps can help you predict strong natural light by showing cloud cover, sun position, and changing conditions. They make it easier to time golden hour, spot open shade, and choose lighting that supports the mood you want in your photos.
Which Lenses Work Best for Natural Light Photography?
Prime lenses suit natural light photography because they let in more light and keep image quality strong. A 35mm, 50mm, or 85mm lens with a wide aperture can produce sharp subjects, soft background blur, and portraits with a warm, natural look.
How Does White Balance Affect Natural Light Color Accuracy?
White balance affects natural light color accuracy by aligning the camera with the scene’s color temperature, which keeps colors realistic instead of overly warm or cool. Precise light calibration helps produce images with believable, consistent tones.
What Camera Settings Help Reduce Noise in Low Natural Light?
In low natural light, reduce noise by using the lowest ISO you can manage, opening the aperture wider, and lengthening the exposure when the scene allows. Aim for a strong exposure without blowing highlights, shoot in RAW, and keep the camera steady with a tripod or solid surface for cleaner results.
When Should I Use a Polarizing Filter in Natural Light?
Use a polarizing filter in bright natural light when you want to reduce reflections on water, glass, or leaves, and make blue skies appear richer. It helps cut glare, improve color separation, and produce a clearer, more defined image.