
Choosing the best lens starts with two things: your camera and the photos you want to take most. A prime lens gives you sharp image quality and a simple setup, while a zoom gives you more range in one lens. The right pick can save money, cut stress, and help you enjoy shooting more from day one. Here’s a quick guide to make lens shopping feel clear and easy.
How to Choose the Right Camera Lens
Next, consider focal length and aperture together. A 35mm shows more of the scene, while a 50mm feels balanced and familiar. Wider apertures like f/1.8 help in dim spaces and create soft background blur.
Zooms give flexibility for travel, family events, and sports.
Also check lens material and lens coatings. Better materials improve durability, and quality coatings reduce glare, enhance contrast, and help your photos look clean and confident.
Check Camera Lens Mount Compatibility First
Before you compare sharpness, zoom range, or price, make sure the lens mount matches your camera body, because even a great lens won’t help in the event that it simply doesn’t fit.
That initial compatibility check saves you stress, money, and the awful feeling of buying the wrong gear.
Every camera brand uses specific mounts, so camera compatibility always comes before excitement. Sony E-mount lenses fit Sony E bodies. Canon RF and RF-S lenses fit Canon RF cameras. Nikon users need the right F-mount or Z-mount match, too.
Some older lenses work only with certain bodies, which can confuse anyone at the outset. You’re not behind in case this feels tricky. You’re learning what every photographer learns. So, check your camera model, confirm the lens mount, and read the supported systems before you buy.
Match Your Lens to What You Shoot
Once you know a lens will fit your camera, the smart move is to match it to the kind of photos you actually want to make. Your best choice depends on where you shoot, who you photograph, and how you want your images to feel.
Whenever you choose with purpose, you feel more confident and more connected to the photography community around you.
- For portraits and everyday moments, a normal focal length gives you a natural look.
- For sports, kids, or wildlife, more reach helps you handle subject movement with less stress.
- For travel, sceneries, or tight rooms, a wider view lets you fit more into the frame.
Also, consider lighting conditions. In case you often shoot indoors or at events, a lens that performs well in dim light will help you keep creating with ease.
Choose Between a Prime and Zoom Lens
How do you know whether a prime or zoom lens is the better fit for you? Start with how you like to shoot. A prime lens gives you one view, so you’ll move your feet and sharpen your composition skills. It also lets in more light, which helps in low light and gives portraits a soft background many beginners love.
A zoom lens gives you flexibility and helps you stay in the moment. You can frame quickly without changing lenses, which feels easier while you’re still finding your rhythm.
That’s why many new photographers feel at home with a zoom initially. In case you want a simple challenge and cleaner results, choose a prime. Should you want convenience, travel ease, and fewer missed shots, choose a zoom. Both can help you grow with confidence.
Make Sense of Lens Focal Length
Focal length shapes how much of the scene you capture and how close your subject feels, so it changes the look of every photo you take.
Should you want broad views, a wide lens gives you more space, while a telephoto lens pulls distant subjects in tight.
Once you understand that range, you can choose a lens that fits your style and makes shooting feel a lot less confusing.
Understanding Focal Length
Why does focal length matter so much when you select a lens? It shapes how your photos feel and helps you fit in with the style you love. A 50mm gives a natural look, while 35mm feels more open and social.
In case you use crop sensors, that view changes, so lens choice matters even more.
Here’s a simple way to consider it:
- 35mm works well for everyday scenes, storytelling, and full-body portraits.
- 50mm feels familiar to your eye and makes a great initial lens.
- Zooms like 24-70mm give flexibility, while primes teach framing and highlight prime advantages.
As you learn focal length, you’ll trust your choices more. You won’t feel lost in gear talk. Instead, you’ll know which lens matches your creative voice and growing confidence behind the camera.
Wide Vs Telephoto
Should you compare wide and telephoto lenses, the biggest difference is the way they shape space in your photo. A wide lens makes nearby subjects feel larger and pulls more of the scene into view. That creates energy and helps you feel part of the moment.
A telephoto lens does the opposite. It narrows the view, brings distant subjects closer, and adds lens compression, so objects seem stacked together.
Because of that, each lens changes mood. With a wide lens, you can place your viewer right in the scene, which feels open and welcoming.
With a telephoto lens, you isolate what matters, often with stronger background blur and a calmer look. As you practice, you’ll start seeing how each focal length helps your photos feel more like you and your community.
Choosing The Right Range
Once you see how wide and telephoto lenses change the feel of a photo, the next step is choosing a range that fits what you shoot most. In case you want one lens that helps you feel ready anywhere, start with focal lengths that match your daily scenes.
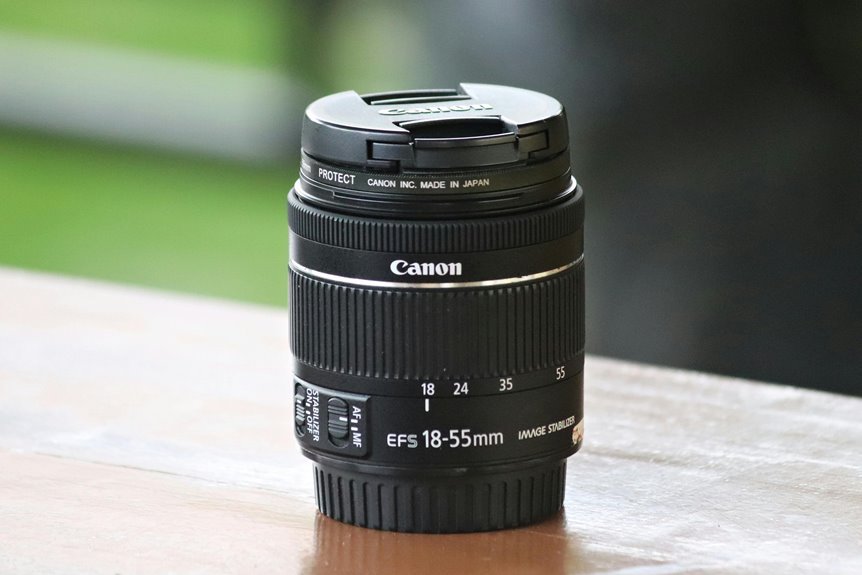
A beginner-friendly zoom range like 24-70mm or 18-55mm gives you room to grow without constant lens swaps.
- 35mm feels open and social, great for stories, travel, and group moments.
- 50mm looks natural, so you’ll feel at home shooting portraits, events, and everyday life.
- 70-200mm brings distant action closer, which helps for sports, stage, and candid shots.
As you compare options, check aperture, stabilization, and lens material too. Those details affect comfort, durability, and results, so you’ll choose with confidence and feel part of the craft.
Pick the Best Lens Aperture for Your Style
How wide should your aperture be for the way you shoot? In case you love soft backgrounds and low-light scenes, choose f/1.8 or f/2.8. You’ll feel right at home with a fast prime, especially a nifty fifty. In the event you prefer control, manual focusing can help you place sharpness exactly where it belongs. Also, rounded aperture blades make background blur look smoother and more natural.
| Style | Best Aperture |
|---|---|
| Portraits | f/1.4 to f/2 |
| Everyday shooting | f/1.8 to f/2.8 |
| Street photos | f/2 to f/4 |
| Travel | f/4 to f/5.6 |
As your style grows, your aperture choice shapes your look. Wider settings create mood and subject separation. Narrower settings keep more of the scene clear. You’re not behind here, you’re learning what fits your voice best.
Decide If You Need Image Stabilization
Why does image stabilization matter so much during you’re choosing a lens? It helps you get sharper photos when your hands shake, light gets low, or lens weight makes holding steady harder.
Should you be part of the growing photo community, stabilization can enhance confidence fast.
It matters most while you shoot:
- handheld in dim rooms or at night
- longer zoom ranges, where small shakes look bigger
- video, where smooth motion helps your work feel polished
In case you mostly use fast shutter speeds, a tripod, or manual focus for still subjects, you mightn’t need it often.
But suppose you travel, walk, or shoot family moments, stabilization gives you more keepers and less stress. You’ll feel more in control, and that sense of progress helps you stay excited, connected, and ready to create more.
Set a Budget for Your Next Lens
Before you shop, set a clear spending limit so you don’t get pulled toward a lens that looks incredible but strains your budget.
Then match price to the features you’ll truly use, like a wider aperture for low light or a zoom range that fits your style.
In case you plan ahead, you can buy smart now and leave room for a better upgrade later.
Define Your Spending Limit
Instead, start through setting a clear spending limit, because your budget shapes every smart lens choice that comes afterward.
Once you know your range, you shop with confidence and avoid feeling left out owing to flashy gear talk. You stay grounded, practical, and part of the group that buys with purpose.
To make that limit feel realistic, map out your full buying plan initially:
- Include taxes, filters, and shipping, not just the lens price
- Watch for discount strategies during holiday sales, bundles, or refurbished deals
- Compare financing options carefully, so monthly payments don’t crowd your other photo goals
Next, decide your comfort zone. Pick a number that supports your hobby without stress.
Provided money feels tight, that’s okay. Plenty of photographers grow their kit slowly, and you’re still moving forward with everyone else.
Balance Cost And Features
Although it’s tempting to chase the sharpest glass or the fastest aperture, the smartest lens choice comes from matching features to the way you actually shoot.
Whenever you set a clear limit, you give yourself room to choose with confidence, not pressure. That matters, especially whenever you want gear that helps you feel capable and included.
Plan For Future Upgrades
As your skills grow, it helps to set a simple budget for your next lens so each upgrade feels planned, not rushed. At the point you know what you shoot most, you can save with purpose and avoid buying gear that doesn’t fit your style. That makes your upgrade pathway feel clear and welcoming.
- Set a target price based on your camera mount and favorite subjects.
- Save initially for the lens that fixes your biggest limit, like low light or reach.
- Rent before buying, so your future proofing lens truly supports your growth.
This step connects naturally with balancing cost and features. You already know what matters most, so now you can plan ahead with confidence. Even a small monthly fund helps you stay ready for a smart move, not a panic purchase later.
Choose the Best Lens for Portraits
What makes a portrait lens feel right the moment you raise your camera? You want a lens that flatters faces, softens busy backgrounds, and helps people feel seen. Start with a 50mm f/1.8 should you be new. It feels natural, stays affordable, and invites connection. In case you want more blur and flattering compression, try an 85mm. Good lens coating keeps skin tones clean and contrast gentle. Even manual focus can slow you down in a good way, helping you notice expression.
| Lens | Look | Feeling |
|---|---|---|
| 35mm | Wider scene | Warm, social |
| 50mm | Natural view | Familiar, easy |
| 85mm | Soft background | Intimate, flattering |
As you grow, choose the lens that matches how you want your people to feel: relaxed, confident, and truly part of your frame.
Choose a Lens for Travel and Landscapes
Where do you want your travel photos to take people: into a wide mountain view, a busy street market, or a quiet path at sunset? Your lens shapes that feeling.
For sweeping scenes, choose an ultra-wide lens like 10-18mm. It helps you fit more in the frame and makes viewers feel right there with you.
Then consider flexibility, because travel moves fast and your gear should keep up.
- A 24-70mm zoom gives you range for scenery, streets, and food.
- A lens with stabilization helps during night photography and handheld shots.
- A lighter lens pairs well with travel accessories, so you stay comfortable all day.
If you want one friendly choice, start with a versatile zoom. You’ll pack lighter, shoot more freely, and feel ready wherever the road welcomes you next.
Choose the Best Lens for Sports and Wildlife
At the time you shoot sports or wildlife, you need a lens that locks focus fast and keeps up with unpredictable movement.
You’ll also want enough telephoto reach, like a 70-200mm or longer zoom, so you can fill the frame without getting too close. With the right mix of speed and reach, you can catch sharp action and those brief, exciting moments you don’t want to miss.
Fast Autofocus Essentials
Why does fast autofocus matter so much in sports and wildlife photography? Because your subject won’t wait for you. A lens with strong autofocus speed helps you lock onto action before the moment slips away.
Just as crucial, focus accuracy keeps eyes, faces, or feathers sharp, so your images feel alive and proud to share.
When you choose a lens, look for features that help you stay confident in the field:
- Quiet focus motors track movement smoothly and won’t distract nearby animals.
- Reliable subject tracking helps you follow runners, birds, or pets without fighting your gear.
- Good low-light focusing keeps performance steady at dusk, indoors, or under stadium lights.
With the right autofocus system, you’ll feel more connected, more capable, and more ready to capture the shots your community loves.
Telephoto Reach Choices
How much reach do you really need for sports and wildlife? Should you be near the action, a 70-200mm often feels like the sweet spot. It lets you follow players, frame larger animals, and stay part of the moment without hauling a giant lens.
You also get strong background isolation, which helps your subject stand out cleanly.
When shooting distant birds or field sports from the stands, you’ll want 300mm, 400mm, or longer. That extra reach fills the frame faster and makes your images feel more immersive.
It also enhances telephoto compression, so backgrounds look closer and more dramatic. As you grow, you’ll find that reach isn’t about showing off gear. It’s about giving yourself a fair chance to capture the moments your community cheers for, and the wildlife encounters you’ll proudly share later.
Avoid Common Camera Lens Buying Mistakes
Although a new lens can feel like the fix for every photo problem, the biggest buying mistakes usually happen before you even compare models. You can save money and feel more confident whenever you focus on fit, not hype. A lens should match your camera mount, your shooting style, and your budget.
- Check compatibility initially, because the wrong mount can leave you stuck and frustrated.
- Consider sensor impact, since crop sensors change how focal lengths feel in real use.
- Don’t ignore lens coatings, because they help control glare, contrast, and color in tricky light.
You also want to avoid buying for rare situations. In case you mostly shoot family, travel, or daily life, choose what supports that.
Every time you buy with purpose, you join the community of photographers who grow with every shot.
Compare Camera Lenses Before You Buy
Next, compare lenses side alongside so you can see what really fits your camera and your style.
Start with mount compatibility, because a great lens still fails in case it doesn’t fit your body. Then compare focal length, aperture, size, weight, and stabilization, so you know whether a 50mm prime, a 24-70mm zoom, or a longer telephoto feels right for your everyday shooting.
After that, look closer at handling. Provided that you enjoy manual focusing, test the focus ring and check how smooth it feels. Also compare autofocus speed, sharpness, and lens coatings, since they affect glare, contrast, and color.
When possible, rent or hold each lens in person. You’ll feel more confident as soon as the lens matches your goals, your budget, and the kind of photos that help you feel part of the photography community.
Frequently Asked Questions
How Do I Clean a Camera Lens Safely at Home?
Start with a lens blower to lift off loose dust without touching the glass. Next, use a clean microfiber cloth and wipe lightly in small circles from the center outward. If fingerprints or streaks remain, apply a small amount of lens cleaner to the cloth, not directly to the lens. This keeps the coating clear and helps prevent scratches.
When Should I Use Lens Filters, and Which Ones Matter?
Use lens filters when they fix a specific issue. A polarizing filter reduces reflections from water, glass, and wet surfaces, and it can make blue skies look richer. A neutral density filter cuts the amount of light entering the lens, which helps you use slower shutter speeds for motion blur even in bright conditions. Skip low quality UV filters unless you want extra front element protection.
How Should I Store Lenses to Prevent Fungus and Dust?
Store lenses only after cleaning them, with both caps attached, standing upright in a padded case or a sealed cabinet. Keep humidity near 40 to 50 percent and place fresh silica gel inside the storage area. This reduces fungus growth, limits dust buildup, and keeps the glass in reliable condition.
Do Expensive Lenses Hold Their Resale Value Better?
In most cases, expensive lenses keep more of their value because buyers look for trusted brands, durable construction, and optical performance. Choosing a widely used mount and keeping the lens in excellent condition makes it easier to attract serious buyers in the secondhand market.
How Can I Tell if a Used Lens Has Hidden Problems?
Never buy a used lens on faith. Check the glass for haze, fungus, scratches, and dust. Test autofocus, zoom, image stabilization, and focus rings. Inspect aperture blades for oil or slow movement. Take sample photos at different apertures and focus distances to reveal hidden issues.
