Perspective changes how a photo feels right away. A low angle can add strength, while a high view can show patterns and shape. Moving closer, stepping back, or adding something in front can shift the whole scene. With a few simple angle changes, everyday photos can look more bold, creative, and full of life.
Use Camera Angle to Change Perspective
As you change your camera angle, you don’t just move the camera, you change how the whole scene feels. That shift helps you see like you belong inside the moment, not outside it. Crouch low, and everyday subjects gain energy and surprise. Shoot from above, and busy spaces open up with a calm, shared rhythm.
Then tilt your view with oblique angles to build stronger depth and motion. Photograph a building corner, and parallel lines pull the eye inward. Should you aim up from below, you can create a bold three point feel, where height seems dramatic and alive. Wide views make that effect stronger.
As you test these angles, ordinary places start welcoming you back with fresh character, and your photos feel more personal, connected, and full of presence.
Move Closer or Farther to Reshape Perspective
If you move closer, your subject grows fast, and the background seems to stretch away.
As you step back, size relationships shift, and more of the scene starts to feel balanced in your frame.
That simple change in distance gives you a powerful way to control scale and shape the story your photo tells.
Distance Changes Scale
Should you want to reshape viewpoint fast, change your distance before you change your lens. As you step closer, your subject grows stronger in the frame, and nearby parts expand faster than distant ones. That’s how depth scale starts to feel vivid and personal. Move in on a face, a flower, or a hand, and you’ll observe perspective distortion make close features look larger.
Then, once you step back, size differences calm down. Objects seem more similar in scale, and the scene feels flatter, steadier, and more connected. This matters whenever you want people, products, or details to feel like they belong together naturally.
As you practice, trust your feet. Small distance changes can completely shift how welcoming, dramatic, or intimate your photo feels, without any camera magic tricks at all.
Shift Your Framing
In case you want to reshape viewpoint fast, shift your framing with your feet initially. At the moment you move closer, your subject feels larger, stronger, and more personal. As soon as you step back, you give nearby objects room to relate, and the scene starts breathing. That simple change helps you belong to the moment instead of just recording it.
As you reframe, watch how lines and spacing change. Try oblique angles to pull building edges or paths into deeper space. Then pay attention to middle layering, because a person, tree, or chair between front and back areas makes depth feel natural. You can crouch, lean, or rise a little too. Each small move reshapes scale, balance, and connection.
Soon, you’ll trust your position choices, and your photos will feel more welcoming, alive, and shared with others.
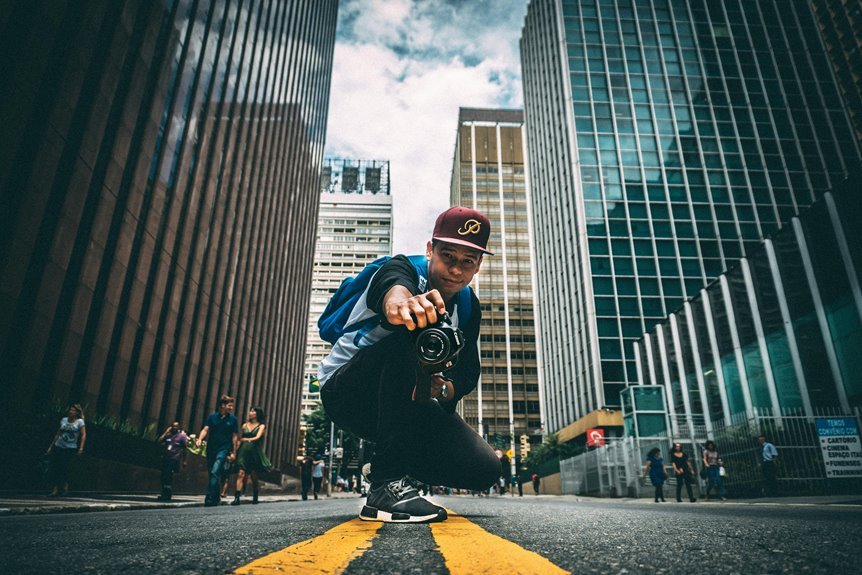
Shoot From a Low Angle for Impact
Near dropping your camera close to the ground, you can give an ordinary subject real power and presence. From ground level, even a small object can feel significant, bold, and worth noticing.
In case you use a wide angle lens, nearby details stretch forward and lines race upward, which adds energy without feeling forced. That shift helps you create unusual viewpoints that make your photos feel fresh and personal.
When you aim upward, people, trees, and buildings can turn into towering silhouettes against the sky. You don’t need a famous location either. Your neighborhood sidewalk, a friend’s bike, or your child’s rain boots can suddenly look heroic.
As you practice, you’ll start seeing scenes the way other photographers in your circle do, and that shared way of seeing helps you feel connected, confident, and creatively at home.
Shoot From Above for Graphic Patterns
Once you shoot from above, you turn everyday scenes into bold patterns and clean shapes. You can hunt for repeating lines, colors, and textures that stand out best from a top-down view.
And whenever you build a flat lay, you control the geometry, so your photo feels balanced, graphic, and instantly engaging.
Top-Down Pattern Hunting
Climb a step higher, lean over the scene, and you’ll start to notice patterns that disappear at eye level. From above, everyday subjects begin to feel connected, like they’re part of a visual rhythm you can join. Tiles, tables, umbrellas, market stalls, and parked bikes suddenly make sense through pattern recognition, and your frame feels more intentional.
As you refine your view, look for repeated shapes, spacing, and contrast. Move a little left or right, and you’ll strengthen the design without making it feel forced. This angle helps you turn busy places into geometric abstraction while keeping real-world texture alive.
You don’t need a dramatic subject, either. A café floor, beach chairs, or a row of backpacks can welcome you into the scene. Whenever you spot order in chaos, your photo feels shared and satisfying.
Flat Lay Geometry
Should you want a scene to feel clean, bold, and graphic, shoot straight down and let the frame do the organizing. You create order fast, and that helps everyday objects feel like they belong together. Align edges, repeat shapes, and control spacing so geometric symmetry feels natural, not stiff. As depth falls away, you get spatial abstraction that turns simple items into design.
| Choice | Impact |
|---|---|
| Tight spacing | Strong rhythm |
| Matched angles | Clear harmony |
| Repeated colors | Unified pattern |
Because you’re shooting from above, small shifts matter. Move one spoon, leaf, or notebook corner, and the whole image settles. Keep backgrounds plain, use soft light, and check every edge. Soon, you’ll see flat lays as welcoming visual puzzles that invite viewers in and make your style feel confidently shared.
Add Foreground Elements for More Depth
Although depth can feel hard to capture in a flat photo, you can build it fast through placing a strong foreground element close to the lens. A leaf, fence, doorway, or shoulder gives your scene a near point that welcomes viewers in. It makes the image feel lived in, not distant.
From there, consider in overlapping layers. Place something close, keep your subject in the middle, and let the background sit farther away. Your eye reads that spacing as real depth. Diminishing scale helps too, because objects naturally look smaller as they move back.
You don’t need fancy gear for this trick. You just need to notice what’s around you and use it with purpose. Whenever you do, your photos feel richer, warmer, and easier for others to connect with instantly.
Use Leading Lines to Guide the Eye
Once you’ve added layers for depth, you can strengthen that effect with leading lines that pull the eye through the frame. Roads, fences, hallways, rails, and shorelines help your viewer feel invited into the scene, as though they belong inside the moment with you.
To make that pull stronger, place those lines so they point toward your subject or a key area. Converging lines work especially well because they create motion and depth at the same time.
In case you want more energy, try a diagonal composition. It feels less formal and more alive, which helps your photo connect faster.
You don’t need a famous location, either. A sidewalk, row of seats, or bridge can do the job. Whenever you notice these paths and frame them with care, your images feel more welcoming, clear, and confident.
Try Forced Perspective in Photography
Play with scale, and your photo can turn into a clever visual surprise. With forced perspective, you place subjects at different distances so they seem to interact in one flat frame. You can make a friend hold the sun, balance a landmark on a fingertip, or use natural object mimicry with flowers, leaves, or shells.
To make the illusion work, move yourself initially. Then guide your subject into place. Small shifts in angle can break the effect, so stay patient and keep checking edges.
Depth elimination matters here because a flatter look helps the trick feel real. You can use a narrow view, careful focus, and clean backgrounds to simplify the scene.
As you try playful setups like these, you join a creative tradition that invites everyone to see ordinary spaces with amazement.
Frequently Asked Questions
Which Lens Focal Lengths Work Best for Emphasizing Perspective?
A wide angle focal length makes shifts in viewpoint more obvious because it stretches the sense of depth and increases the apparent distance between near and far subjects. A longer focal length reduces that effect and creates telephoto compression, which makes elements in the scene appear closer together and gives the image a flatter, tighter look.
How Does Aperture Affect Depth Cues in Perspective-Heavy Photos?
Aperture changes how depth is read in perspective rich photos. A wide aperture softens background and foreground detail, letting the main subject stand apart. A narrow aperture keeps more planes in focus, which makes distance and spatial relationships easier to see. Use it to control how strongly the scene feels layered and dimensional.
Can Perspective Techniques Improve Smartphone Photography Results?
Yes, perspective techniques can greatly improve smartphone photography. Change your shooting angle, place a strong subject in the foreground, and try higher or lower positions. These choices add depth, create visual interest, and make your photos look more refined and memorable.
When Should Perspective Distortion Be Corrected in Post-Processing?
Correct perspective distortion in post-processing when tilted lines or stretched features pull attention away from the subject. This matters most in architecture, interior photography, and portraits where facial proportions or structural lines need to look intentional. Leave distortion in place when it adds tension, scale, or energy that supports the image. Once the geometry is set, apply color grading to unify the final look.
How Can Weather Conditions Influence Perceived Depth in Images?
Weather shapes depth cues in distinct ways. Fog reduces contrast and detail in far areas, which makes distance easier to read. Shadows define edges and volume, helping subjects stand apart from the background. Mist, cloud cover, and low sunlight can strengthen spatial layers and give the image a stronger sense of depth.