Black and white photography works best with strong light, clear shapes, and rich texture. Good contrast often comes from side light or backlight, while careful exposure keeps bright areas clean and shadows deep. Strong lines and layered subjects help photos feel dramatic instead of flat. With a few smart choices in camera and editing, black and white images can carry real mood and depth.
See in Black and White Before You Shoot
Before you press the shutter, train yourself to see the scene as a range of light, shadow, shape, and texture instead of color. That shift helps you join the mindset of strong black and white photographers. You stop asking what colors look pretty and start noticing what tones feel powerful.
Consider color blindness as a practice tool, not a flaw. Whenever you ignore color, your eye gets better at reading brightness, depth, and mood.
From there, grayscale visualization becomes your quiet guide. You begin to spot bright highlights, deep shadows, and the spaces between them. Look for moments where light separates your subject from the background. Watch how shadows simplify a busy scene.
The more you practice this way of seeing, the more your images feel intentional, moody, and deeply connected.
Choose Subjects With Texture and Shape
At the moment you strip away color, texture and shape do the heavy lifting in your image. You should look for rough surfaces, deep lines, and repeating forms that give the photo a stronger sense of depth and feeling.
At the same time, bold silhouettes help you simplify the scene, so your subject stands out with power and clarity.
Emphasize Surface Details
Look for texture initially, because black and white photography comes alive through surface detail and shape. You’ll feel more connected to your images whenever you notice cracked paint, weathered wood, wrinkled fabric, or worn stone. Then, use sidelighting to rake across those surfaces, because shadows reveal depth your community of viewers can almost feel.
| Surface | What you should notice |
|---|---|
| Brick walls | Chips, grit, repeating lines |
| Tree bark | Grooves, peeling layers |
| Metal | Scratches, dents, reflections |
| Fabric | Folds, weave, softness |
| Skin | Freckles, lines, contours |
As you edit, keep details believable. Gentle clarity tools can lift texture without making it harsh. In case you want a softer mood, a matte effect can hold detail while easing extreme blacks. That way, your photos still feel rich, welcoming, and shared.
Highlight Bold Silhouettes
Because silhouettes strip a scene down to shape and contrast, they help you make black and white images that feel bold, clean, and deeply expressive. You don’t need famous subjects either. A friend with a strong profile, a cyclist, bare branches, or a hat with a wide brim can all give you real silhouette clarity.
To strengthen that effect, look for subjects that read instantly and separate well from the scene around them. That’s where background isolation matters most.
- Pick recognizable outlines with texture and shape.
- Use backlighting so the subject turns dark and the edges stay crisp.
- Keep the background simple, bright, and free of clutter.
When you practice this, you start seeing like part of the black and white community. Your images feel more confident, and honestly, so do you behind the camera.
Use Light Direction for Stronger Contrast
Although contrast starts with light and shadow, the real power comes from where the light hits your subject. Whenever you change light direction, you shape mood, depth, and texture in ways that make your photo feel like it belongs in a strong black and white series.
Try sidelighting if you want texture to stand out. It rakes across faces, walls, and fabric, giving your image a raw, honest feel.
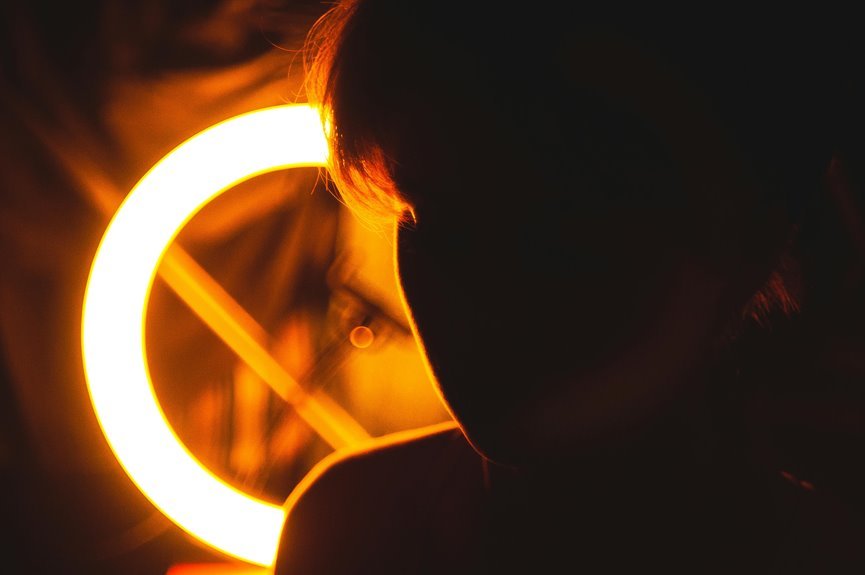
Backlighting works differently, creating halos or dark outlines that help your subject feel bold and connected to the scene.
Even harsh midday sun can help whenever you want deep shadows and crisp edges. Then, low angle light stretches shadows into graphic shapes, adding rhythm and meaning.
As you notice these shifts, you’ll start seeing light like other photographers in your community do.
Expose Black and White Photos Correctly
At the moment you expose black and white photos with care, you give the image its real voice before editing even starts. In this stage, you’re not guessing. You’re learning to trust what the light gives you, and that helps you feel like part of the craft, not outside it.
Then, keep your process simple and steady:
- Meter the brightest area initially to expose highlights and protect detail.
- Use Aperture Priority as light shifts, then adjust exposure compensation to guide mood.
- Check your histogram often so bright whites don’t clip and deep blacks stay intentional.
Because black and white depends on tone, small changes matter.
Whenever you expose with purpose, shadows can stay rich, highlights can breathe, and your frame feels honest. That’s where your style starts to feel truly yours.
Compose Black and White Photos for Depth
Start through looking for shape before subject, since depth in black and white often comes from how forms sit across the frame, not from color pulling attention. You’ll feel more at home with this approach once you place clear foreground, middle ground, and background elements together.
Then guide the eye with lines, curves, and geometric patterns that repeat or break at the right moment. Fill the frame with symmetry whenever it helps, but leave breathing room whenever a scene needs calm. You can also layer rough and smooth surfaces so the image feels touchable and lived in.
As you compose, step side to side, crouch lower, and move closer until forms separate cleanly. Even a gentle matte effect later works better when your framing already gives the photo structure, space, and connection.
Use Shadows and Highlights to Create Mood
Once you begin to treat light and shadow as emotional tools, your black and white photos start to feel less like records and more like stories. You’re not just showing a scene. You’re inviting people into a feeling they recognize and want to share.
- Use midday harsh light whenever you want tension, grit, or a bold street mood.
- Try backlighting silhouettes to hide detail and let mystery lead the frame.
- Watch how sidelight shapes faces, walls, and hands, because texture can make an image feel close and human.
As you practice, you’ll notice highlights can suggest hope, while deep shadows bring quiet, distance, or strength. That contrast helps your photos connect with others. It reminds people they belong inside the moment, not outside it, just looking in from afar.
Edit Black and White Photos for Tonal Range
Shape the feeling in your image through editing for tonal range, because black and white works best whenever every gray has a job to do. Once you edit, start with histogram monitoring so you can see whether your shadows are blocked or your highlights are fading away. That gives you a steady path forward.
Next, guide the eye with careful curves and levels. You don’t need extreme moves. Instead, build post processing contrast in small steps, then check texture in skin, fabric, stone, or clouds.
In case detail feels thin, use clarity gently. In the event bright areas pull too hard, ease them back. In case dark areas feel weak, deepen them with control.
As you refine tones, your photo starts to feel more like it belongs with your vision, and with the kind of work you want to share.
Avoid Flat Black and White Images
To keep your black and white photos from feeling flat, you need stronger tonal separation between your lights and darks.
You can build that contrast intentionally through shaping light with backlighting, sidelighting, or other directional light that gives your subject more depth. Once you start seeing light as a tool instead of just exposure, your images feel richer, bolder, and far more alive.
Boost Tonal Separation
In case your black and white photo looks dull, the problem usually isn’t the subject, it’s weak tonal separation between the light and dark areas. To fix that, you want brighter highlights, deeper shadows, and clean midtone contrast that helps every part feel distinct. You’re not alone here. Every photographer in our circle wrestles with flat files sometimes.
- Shoot in aperture priority so you can quickly add exposure compensation and protect bright areas.
- Check your histogram and keep tones from bunching in the middle, where images lose energy.
- Use curves editing to gently pull highlights up and shadows down, while preserving detail.
As you refine contrast, pay attention to adjacent tones. Whenever light gray sits beside dark gray, your subject gains presence, clarity, and that shared moody style you’re chasing together.
Shape Light Intentionally
Chase light with purpose, because black and white lives or dies through the way brightness and shadow fall across your subject. Whenever you shape light on purpose, your photo feels alive, not flat. Look for directional lighting initially. Side light reveals texture, form, and mood. Backlight builds bold outlines and clean silhouettes. Low light stretches shape into something more graphic and inviting.
Then, welcome hard shadows when they serve the scene. Midday sun can become your creative partner, not your enemy. Move your subject until shadow supports the story you want to tell. Expose for the brightest area, and let deeper tones fall with confidence.
As you practice, you’ll start seeing light like other black and white photographers do, and that sense of belonging grows with every frame you make.
Choose Contrast Based on Subject and Mood
Because black and white strips away color, contrast becomes the main way you shape feeling in a photo. You choose it to match your subject, not just to look dramatic.
A quiet portrait might need softer tones and open shadows, while rough streets or bold design often require deep blacks and bright highlights for stronger emotional impact and clearer narrative contrast.
To guide your choice, ask yourself:
- Does your subject feel gentle, tense, proud, or lonely?
- Will strong shadows support the story or hide crucial detail?
- Do texture, symmetry, or shape deserve more attention than subtle tone?
When you match contrast to mood, your image feels honest and welcoming, like it belongs in your visual voice. That choice helps people connect with what you saw and felt, too.
Frequently Asked Questions
Can Smartphone Cameras Capture Strong Black and White Contrast Effectively?
Yes, smartphone cameras can capture striking black and white contrast when you use directional light, control sensor sensitivity carefully, and apply image processing with intention, allowing you to create moody images with a distinct personal style.
Which Lens Types Work Best for Dramatic Black and White Photography?
Prime lenses often produce the cleanest edge detail, while wide angle lenses emphasize structure, scale, and strong foreground to background tension. Short telephoto lenses are especially useful for gentle compression and close, atmospheric portraits with a darker emotional tone.
Should I Shoot RAW or JPEG for Black and White Images?
Shoot RAW for black and white images if you want fuller tonal range and more editing control. RAW files hold more highlight and shadow detail, which helps when shaping contrast and fine tuning the final look.
How Does Film Black and White Photography Differ From Digital?
Film black and white photography has a more tactile look, shaped by grain and chemical development, while digital produces cleaner images, instant preview, and simpler editing. Each offers a distinct way to build your visual style.
What Camera Settings Help Reduce Noise in High-Contrast Black and White Shots?
Reduce noise by keeping ISO as low as possible, using a tripod instead of shooting long exposures handheld, exposing carefully to protect highlights, checking the histogram after each shot, and applying contrast lightly during editing.