

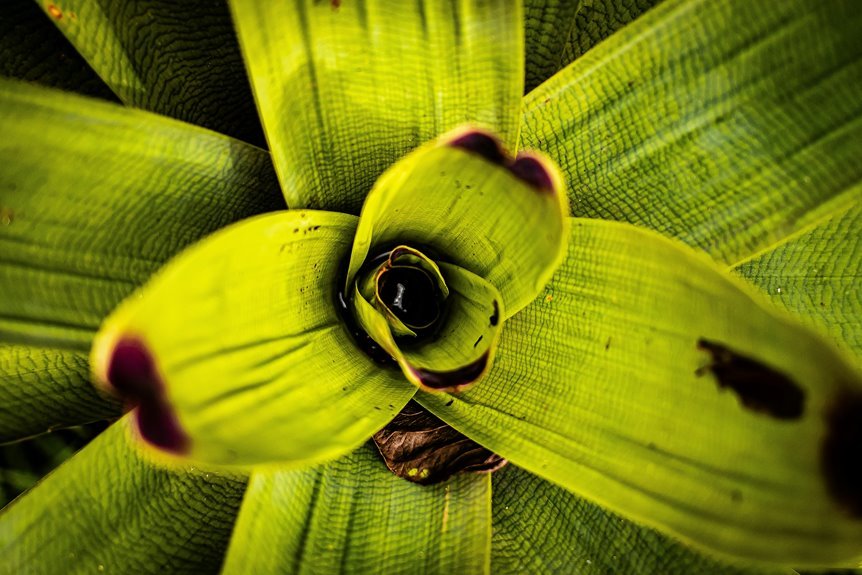

Low light photography comes down to balancing aperture, ISO, and shutter speed so detail stays sharp. A wide aperture, steady shutter speed, and careful ISO choice help keep noise low and texture clear. Good use of available light and precise focus bring out mood without losing the scene. Gentle RAW edits finish the shot with a natural look.
Best Camera Settings for Low Light Photography
Once you’re shooting in low light, the best camera settings start with one goal: let in more light without ruining sharpness. Start with a wide aperture like f/1.8 or f/2.8, because it gathers more light fast. Then keep ISO as low as your camera allows, so your photos stay clean and detailed.
Should you want control, use manual mode and fine tune each setting yourself.
In case you need a simpler path, aperture priority helps you stay quick while keeping that wide opening locked in. Also, shoot in RAW so you keep more detail for editing later. A fast lens makes this even easier, and manual focus can save you once autofocus hunts in the dark.
You’re not guessing here, you’re building skills that help you feel like you truly belong behind the camera.
Balance Exposure in Low Light
To balance exposure in low light, you should meter for the highlights initially so bright areas don’t blow out.
Then raise your ISO with care, because a little noise is easier to fix than a blurry shot. In case your shutter speed gets slow, steady your camera with a tripod, a flat surface, or a timer so you can keep your image sharp.
Meter For Highlights
During the moment bright signs, lamps, or window light sit inside a dark scene, meter for those highlights initially so they don’t blow out and turn into flat white patches. This keeps your photo honest and helps you avoid harsh highlight clipping that no one in your creative circle wants to see.
Then check your preview and histogram together. Should the bright areas still press hard against the edge, lower exposure a little more.
You can let shadows stay deeper for now, especially in case you shoot RAW, because highlight recovery often works better than trying to rebuild lost whites. In real scenes, this choice gives you a smoother, richer frame with texture where it matters most.
You’ll keep the mood, protect detail, and make images that feel polished, thoughtful, and truly yours every single time.
Raise ISO Carefully
Protecting your highlights is only half the job in low light, because you still need enough brightness in the rest of the frame to hold detail and mood. So, raise ISO with care. Begin at your camera’s clean range, then increase only until shadows look usable. You’re not chasing perfection. You’re joining photographers who know texture matters more than fear. Should your camera show iso invariance, a modest ISO might preserve flexibility later. In trickier scenes, test iso stacking exclusively once noise patterns stay consistent.
| Move | Why it helps |
|---|---|
| Test dark scenes | Find your noise threshold |
| Shoot RAW | Keep more recovery room |
| Bracket ISO | Compare detail and grain |
| Watch skin tones | Noise shows there first |
This keeps your image honest, detailed, and welcoming to the eye.
Stabilize For Slower Shutter
Because low light pushes your shutter speed down, keeping the camera steady becomes just as essential as choosing the right ISO. To stay in control, mount your camera on a tripod whenever shutter speed drops below 1/100 second. That simple step helps you keep detail and feel confident with every frame.
In case you don’t have a tripod, use flat surfaces like tables, railings, or a bag to support the camera. Then add remote triggering, a wireless release, or a 2-second timer so your finger doesn’t shake the shot.
Keep your subject still too, since even small movement can soften detail. Should you must shoot handheld, brace your elbows, exhale slowly, and stay near 1/60 second. You’re not guessing here, you’re using steady habits that help your images look clean, sharp, and beautifully intentional tonight.
Choose a Shutter Speed You Can Hold
In low light, you need a shutter speed you can actually hold, or your photo will blur before the light helps you. Start with the handholding rule, then match your shutter speed to your lens so longer focal lengths don’t magnify shake.
Should your hands aren’t perfectly steady, use solid posture, brace your camera, and slow down only as much as you can control.
Handholding Speed Rule
At the moment you’re shooting in low light without a tripod, your shutter speed becomes the line between a sharp photo and a blurry one. You want a setting your hands can truly support, not one that only looks good on paper. That’s where handheld stability matters. Should your image soften when you breathe, press the shutter gently and raise your speed a little.
Even in a supportive photography community, everyone has different shutter limitations. Many people can hold around 1/60 second with care, but your real number depends on how steady you feel in that moment.
Match Speed To Lens
At the moment you switch lenses, your safe shutter speed should change too, since longer focal lengths make every tiny hand movement look bigger in the frame. A 24mm lens gives you more room than an 85mm or 200mm, so you need a faster setting as your lens gets longer. That simple match helps you keep detail and feel more confident with your camera.
As you grow, pay attention to how each lens behaves in your hands. Your comfort matters, and your results will show it. A well-tested setup, including lens calibration, helps you trust what looks sharp.
In case you’re adding flash, shutter synchronization also affects the speed you can choose. In low light, shorter focal lengths often give your whole creative circle a better chance at sharp, usable frames together.
Reduce Camera Shake
Once you match shutter speed to your lens, the next step is making sure that speed also matches your hands. In case you’re handholding, start around 1/60 and test your comfort. Some days you’re steady. Other days, coffee wins. Tuck your elbows in, exhale slowly, and press gently to reduce shutter vibration. Should blur still sneaks in, raise shutter speed before ISO climbs too far.
| Situation | Safer Speed | Support |
|---|---|---|
| Wide lens | 1/60 | Handheld |
| Normal lens | 1/100 | Wall or table |
| Telephoto | 1/200+ | Tripod |
Once light drops further, use a timer, remote, or solid surface. Check for tripod looseness too, because tiny shifts ruin detail. You’re not failing whenever you need support. You’re working like photographers do, together, learning what your hands can truly hold in dim spaces.
Stabilize Your Camera in Low Light
When light gets low, even a tiny shake can turn a good photo into a soft, blurry mess, so keeping your camera steady matters just as much as your exposure settings. You’re not alone here. Every low-light shooter learns that stability builds confidence and keeps detail intact.
- Start with solid tripod placement on level ground, and spread the legs wide for balance.
- Should you not have a tripod, brace your camera on a bench, wall, or bag to cut movement.
- Use a gentle shutter release with a 2-second timer or remote, so your hands don’t jolt the shot.
Then help your body work with the camera. Tuck in your elbows, control your breathing, and pause before pressing. In case your subject can stay still too, you’ll feel like part of the sharp-photo club.
Set Aperture for Light and Depth
You’ll want to open your aperture wide to pull in more light, but you also need to watch how it affects sharpness across the frame.
A low f-stop like f/1.8 can help you shoot in darker scenes, yet it also creates a thinner zone of focus. As you adjust your f-stop, you control both the brightness of your photo and how much of the scene stays sharp.
Balance Aperture And Sharpness
Because low light pushes your camera hard, aperture becomes one of your most useful tools for keeping photos bright without giving up too much sharpness. You want enough light, but not at the cost of soft results. That’s the sharpness tradeoff every low light photographer learns to manage.
- Open your lens wide whenever light is scarce, but test where it looks crispest.
- Avoid stopping down too far, because aperture diffraction can soften fine detail.
- Pair your aperture choice with the lowest practical ISO, so your images stay clean and clear.
You’re not guessing here. You’re learning what your lens does best, and that makes you part of the photographers who get detail right. In dim scenes, many lenses sharpen up slightly from wide open, frequently around f/2 to f/4 in real use.
Control Depth With F-Stop
As light gets thin, your f-stop does two jobs at once: it brightens the frame and shapes how much of the scene stays in focus.
Whenever you open the lens wide to f/1.8 or f/2.8, you pull in more light and soften the background. That helps your subject stand out, which feels natural in portraits, food shots, and quiet indoor moments.
Then, in case you need more of the scene sharp, close the aperture a bit to f/4 or f/5.6. You’ll lose some light, so balance that with shutter speed or ISO.
This is where aperture control really matters. It lets you guide the eye with smart depth manipulation. You’re not just fixing exposure. You’re choosing what belongs in focus and what fades away. That choice gives your low light photos warmth, intention, and a shared visual connection.
Raise ISO Without Losing Too Much Detail
As the light gets thin and your shutter speed can’t go any slower without blur, raising ISO becomes the smart move, not a mistake. You’re not failing the shot, you’re adapting like every low light photographer learns to do.
Start after testing your camera’s noise threshold, so you know how far you can push ISO before detail falls apart.
- Raise ISO only until your exposure looks solid and motion stays controlled.
- Shoot RAW, because it gives your group more room to recover texture and tone.
- Use post processing noise reduction gently, so skin, fabric, and small edges still look real.
That balance matters. A sharp image with a little grain usually feels better than a blurry one with clean shadows. Stay practical, trust your camera, and let modern sensors help you keep the moment alive.
Focus Faster in Low Light
As soon as autofocus starts hunting in the dark, don’t panic and keep stabbing at the shutter like it owes you money. You’ve got better options. Switch to a single focus point, aim at an edge with contrast, and half-press once. In case your camera has autofocus assist, turn it on. That small beam helps your camera lock faster. Then watch for focus confirmation before you fully press.
| Problem | Quick fix | Why it helps |
|---|---|---|
| Hunting lens | Use one point | Faster lock |
| Flat subject | Find contrast | AF needs edges |
| Dim scene | Enable autofocus assist | Adds target light |
| Missed sharpness | Check focus confirmation | Confirms lock |
| Still struggling | Use manual focus | Gives you control |
You’re not failing here. Every low-light shooter learns this rhythm, and you will too.
Meter for Highlights in Low Light
Once light gets scarce, your camera meter can get fooled through bright signs, lamps, and reflections, so you need to protect those highlights initially. In case you expose for the whole scene, those bright areas can blow out fast.
Instead, meter from the brightest crucial part, then lower exposure slightly to avoid highlight clipping. That choice helps you keep texture where it matters most.
To make this easier, stay intentional:
- Use spot or responsive metering to read the brightest useful area.
- Check your preview and blinkies, then trim exposure if highlights flash.
- Let shadows fall a bit darker if needed, because your photo community knows mood belongs in low light.
You’re not chasing perfect brightness. You’re choosing what deserves detail, and that control helps your images feel rich, honest, and beautifully yours.
Shoot RAW for Better Recovery
Because low light often leaves you balancing bright highlights against deep shadows, shooting in RAW gives you far more room to recover detail should the exposure isn’t perfect. You keep more image data, so you can lift shadows, pull back highlights, and protect textures that JPEG files often throw away.
That matters whenever you’re editing because RAW gives you stronger vibrant range and cleaner color control. You can fine tune white balance, reduce noise, and make careful exposure shifts without your photo falling apart.
In other words, you give yourself breathing room, and that feels good when a great moment deserves saving. RAW also supports better detail improvement, especially in dim scenes where tiny textures matter. In case you want your low light photos to feel polished and true, RAW helps you stay in control.
Use Available Light to Add Depth
In case you use the light already in the room, your photos start to feel richer and more alive. You don’t need more gear to create mood. You need to notice where light falls, where it fades, and how it shapes your subject.
That simple shift helps you make images that feel welcoming and real.
- Move your subject near a window, doorway, or lamp for softer modeling.
- Turn them slightly so the light creates natural contrast across the face.
- Let directional shadows stay visible because they add shape, depth, and story.
As you work, watch how backgrounds change too. A dim corner can make your subject stand out without feeling staged.
You become part of a shared visual language here, using everyday light to build connection, comfort, and a sense of place that draws people in.
Handle Noise in Low Light Photography
Good light gives your photo mood, but noise can quietly chip away at that clean, rich look. To stay in control, keep your ISO as low as the scene allows, then test your camera in dark spaces so you learn its limits. That habit helps you feel more confident every time you shoot.
From there, watch exposure closely, because underexposed files often show the most grain. Should it be needed, expose slightly brighter in camera while protecting highlights.
Shoot in RAW so you keep more data, and use noise reduction with care. Too much can smear detail and make faces look waxy, which nobody in our photo-loving circle wants. For even better results, try noise profiling in your workflow. It helps you match cleanup to your camera, your light, and your style with confidence.
Edit Low Light Photos Without Losing Texture
Even although a low light shot looks noisy or flat at initially, you can still bring it back without stripping away the skin, fabric, and fine detail that make it feel real.
- Start with RAW files, then lift shadows slowly so surfaces stay natural.
- Use gentle noise reduction at the outset, because heavy smoothing erases texture preservation fast.
- Finish with selective sharpening on eyes, seams, hair, or edges, not the whole frame.
That balance helps your image feel honest and welcoming, like it belongs with the rest of your best work.
Next, adjust contrast in small moves and watch midtones closely. In case blacks get crushed, pull them back. In the event skin turns waxy, ease off. Local masks help you brighten faces while keeping backgrounds soft. You don’t need harsh edits. You need control, patience, and trust in your eye.
Fix Common Low Light Mistakes
At that moment low light photos go wrong, the problem usually comes from one of a few fixable mistakes, not from your camera or your skill. You’re not behind here. Most of us initially miss focus, raise ISO too far, or shoot too slow without support.
So start simple: steady your camera, widen your aperture, and keep shutter speed fast enough for your subject.
Then check color and contrast issues. Mixed bulbs can confuse white balance and hurt color accuracy, making skin look strange. Bright streetlights might also cause lens flare, so change your angle or shade the lens.
In case grain looks rough, review your ISO choices and learn your camera’s noise patterns. Also shoot RAW, zoom in to check sharpness, and use manual focus whenever autofocus hunts.
That’s how you stay in the club.
Frequently Asked Questions
How Does Weather Affect Low Light Photography Results?
Fog lowers contrast and hides fine detail, while rain introduces reflections, richer color, and a thin layer of haze. In these conditions, sharp low light images usually require a steadier camera, shorter subject distance to the light source, and more precise exposure control.
Which Subjects Work Best for Low Light Photography?
Low light photography works especially well with subjects that hold still, such as night portraits, city streets, building details, architecture, silhouettes, and calm interior spaces. People who can stay steady also make strong subjects, giving you a better chance of capturing crisp, atmospheric images worth sharing.
When Should I Use Flash Instead of Ambient Light?
Use flash when ambient light is too weak to stop motion, hold detail, or provide enough fill at a useful distance. It lets you lower ISO for cleaner files, and the light can still look natural when you bounce it or soften it with a diffuser.
Are Smartphones Suitable for Detailed Low Light Photography?
Yes, smartphones can capture detailed low light photos, but sensor size still limits how much detail and clean shadow information they can record. Results improve with image stabilization, a steady hand, available light sources, and RAW capture.
What Accessories Help Most in Low Light Shooting?
In low light, a sturdy tripod, a remote shutter or timer, and a fast lens make the biggest difference. Focus first on tripod stability and a wide aperture, then add LED lights or bounced flash to keep images sharp and well lit.
