

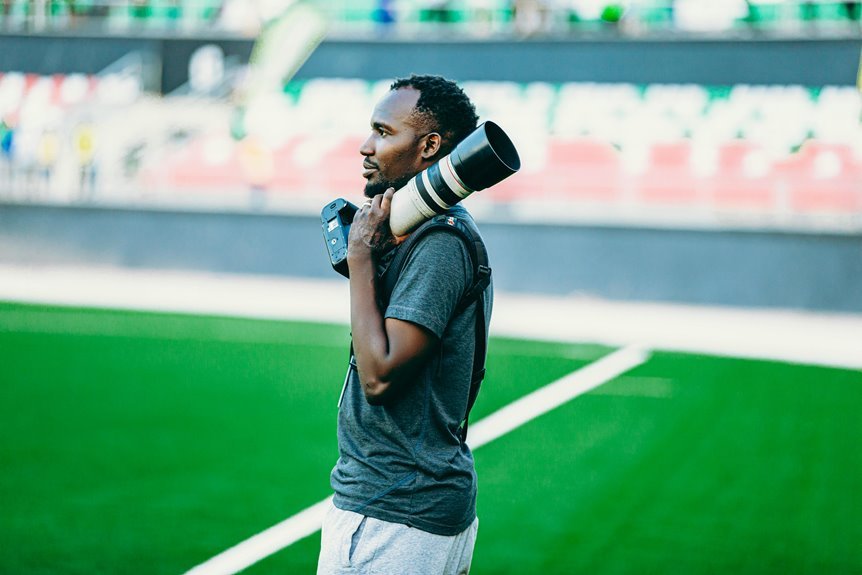

Faster action shots come from a few camera settings working together. Start with shutter speed, aperture, ISO, and focus so motion stays sharp. Then fine-tune burst mode, buffer, and white balance to keep pace with fast plays. With the right setup, your camera is ready for split-second moments under bright lights or at a night game.
Start With a Sports Photography Base Setup
From the moment you start with a solid base setup, sports photography feels far less stressful because your camera is already ready for speed. You feel more confident, and that matters just as everyone around you wants the shot.
Begin with a fast shutter speed around 1/500 second, then push higher for quicker sports. Turn on burst mode so you can catch the exact play, not just the moment before it. Set continuous autofocus with zone points to track athletes smoothly.
Next, choose a wide aperture to let in light and help your subject stand out. Raise ISO as needed, especially indoors, because sharp action beats a little noise.
Good lens selection supports reach and clarity, while smart composition techniques help you frame players cleanly. That foundation helps you shoot like part of the team.
Choose Manual or Shutter Priority
Why choose between Manual and Shutter Priority so soon? Because this choice helps you feel in control before the game gets hectic.
In case lighting stays steady, Manual gives you reliable exposure control from frame to frame. You decide how bright the image looks, and your camera won’t drift once uniforms or backgrounds change.
Shutter Priority works well whenever light shifts across the field or court. You set the timing priority, and the camera adjusts the rest. That makes it easier to stay with the action while still protecting consistency.
To get better results, check your metering modes, because they influence how your camera reads bright jerseys, dark shadows, and mixed scenes. As you practice, you’ll learn which mode fits your style, and that confidence helps you feel like part of the sports photography crowd.
Set a Fast Shutter Speed
Once you’ve chosen Manual or Shutter Priority, the next step is to set a shutter speed that can keep up with the play. Start at 1/500 second to freeze most action. For football, soccer, or anything quicker, move to 1/1000 second or faster. Should you be shooting motor sports, 1/2000 second can save the shot.
Then test a few frames and zoom in. In case players still look soft, raise the speed again. You’re not guessing here. You’re learning what your sport needs, and that helps you feel part of the photographers who get the moment right.
Should you want creative blur, drop to 1/60 second, but use it on purpose. Also watch shutter sync with flash, and carry ND filters for bright days whenever fast settings push exposure too high outdoors.
Use a Wide Aperture for Sports
Because shutter speed alone can’t save a dark frame, you also need a wide aperture to let in more light while the action stays sharp. At the time you open your lens to f/2.8 or wider, you help your camera catch fast plays without losing energy or detail.
That extra light also shapes how your image feels. With smart lens selection, you can blur busy stands and sideline clutter, keeping attention on the athlete. Those soft bokeh effects make your subject stand out and give your photos a polished, team-level look.
You’ll often find that a shallow depth of field works best in cases when one player, one face, or one key moment matters most. As you practice, you’ll see how a wide aperture helps you create cleaner, stronger sports images that feel like you truly belong there.
Raise ISO for Faster Action
Once action speeds up and light drops, you can raise your ISO to keep your shutter speed fast enough to freeze the moment. You’ll get the shot more often, but higher ISO can add noise, so you need to balance clean image quality with sharp action.
In case your photos still look blurry, don’t be afraid to bump ISO up a little more, because a sharp noisy shot usually beats a clean blurry one.
Higher ISO Tradeoffs
Although low ISO gives you the cleanest image, sports often force you to raise it so you can keep your shutter speed fast enough to freeze the action. Once you do, you make a smart trade. You stay in the game with the rest of us who value the moment over perfection.
Higher ISO can add grain, reduce variable range, and make bright highlights clip sooner. It can also increase sensor heat during long bursts, especially in warm gyms.
That said, a sharp frame of the winning goal still beats a silky blur. So raise ISO step by step until your shutter speed feels safe for the sport. Watch your whites, skin tones, and dark uniforms as you adjust.
Provided your camera offers Auto ISO, use it with confidence. You’re not cheating. You’re choosing the shot that keeps you in the action.
Balancing Noise And Speed
How do you keep a fast play sharp without turning your photo into a noisy mess? You raise ISO with purpose. As light drops, your shutter speed still has to stay fast, often 1/500 second or higher, so your camera needs extra sensitivity.
Start low, then increase ISO step after step until motion blur disappears.
That balance matters because you want image clarity, not perfect numbers on a screen. In daylight, 100 to 400 often works. Indoors, 800 or more might be the team player you need.
In case your camera offers Auto ISO, pair it with shutter priority for quick changes. Then use gentle noise reduction later, not heavy smoothing that erases detail. A little grain is normal. A sharp, emotional sports photo always helps you feel part of the action.
Use Continuous AF for Sports
Because sports move fast and rarely give you a second chance, you’ll want to set your camera to Continuous AF, called AF-C or AI-Servo on many cameras, so it keeps tracking your subject as they run, jump, or change direction.
That setting helps you stay in sync with the game instead of fighting your gear. As your player moves closer or farther away, the camera updates focus in real time. That gives you stronger focus accuracy and makes sharp images feel far more repeatable.
Just as crucial, predictive tracking helps your camera anticipate movement, which is huge whenever athletes cut, sprint, or leap without warning. You’ll feel more confident because your camera works with you, not against you. In fast games, that teamwork matters. It lets you follow the action naturally and keep up with the moment.
Pick the Best AF Area Mode
Which AF area mode should you trust once the play gets messy and fast? Start with zone focusing. It gives you a cluster of focus points, so you don’t have to nail one tiny spot while players cut, jump, and collide.
That extra coverage helps you stay with the action and feel more in control.
When movement gets less predictable, choose an adaptive or wide area mode with active tracking. Your camera can follow the athlete as they drift across the frame, which makes fast plays feel less stressful.
Provided you know exactly which player matters, single point still has a place, but it’s less forgiving. Most of the time, a larger AF area keeps you in the game. It gives you room for mistakes, and that confidence helps you shoot like you belong on the sideline too.
Turn On Back-Button Focus
Once the action gets wild, back-button focus gives you one more layer of control without slowing you down. It separates focusing from the shutter, so you decide at what point focus updates and at what point it stays locked.
That extra finger control helps you feel more connected to the game, not behind it.
- Set your camera so the rear button starts autofocus.
- Use your thumb to track players as they move across the frame.
- Release the button the moment you want focus to stay put.
This focus customization makes fast sports feel less chaotic. You can stay ready, react sooner, and trust your timing.
In case you’ve ever felt like your camera had a mind of its own, this setting brings you back into the team. It quickly becomes second nature, almost like muscle memory.
Switch to Burst Mode
Burst mode is your safety net once the play moves faster than your reflexes. You don’t have to guess the perfect instant. You join the rhythm of the game and let your camera capture a quick run of moments. That gives you more chances to catch the kick, plunge, or celebration that makes everyone feel the win.
| Scene | What you do | What you catch |
|---|---|---|
| Sprint start | Hold shutter | Explosive initial step |
| Header jump | Track player | Ball meets forehead |
| Goalmouth scramble | Keep firing | Split-second deflection |
| Slide tackle | Follow through | Flying turf and grit |
Use burst mode whenever action peaks. Your frame rate records a tight sequence, and your shooting duration should match the play, not drag past it. That’s how you stay ready with the crowd.
Optimize Burst Rate and Buffer
To catch more peak moments, you should set the highest continuous shooting rate your camera can handle.
At the same time, you need to watch your buffer, because long bursts can slow your camera right as the action gets good. A faster memory card helps clear those files sooner, so you can keep shooting with less waiting.
Maximize Continuous Shooting
At the moment the action peaks for only a split second, continuous shooting gives you a much better shot at catching the exact play, expression, or impact point. Whenever you fire a burst, you stay with the rhythm of the game and feel more connected to the action around you.
- Set your camera to its fastest burst mode so you can record each tiny change in movement.
- Use a custom shutter button setup in case your camera allows it, because faster response helps you react with confidence.
- Keep an eye on battery performance, since strong power helps your camera maintain speed through key moments.
Just as fast shutter speed freezes motion, continuous shooting helps you choose the strongest frame later. You won’t need perfect timing every time, and that takes pressure off.
Manage Buffer Limitations
When you hold the shutter too long, your camera’s buffer can fill fast, and that can slow you down right at the moment the best play happens. To stay ready, shoot in short bursts, then pause for buffer clearing. That rhythm helps you keep up with the game and feel in sync with the action around you.
| Moment | Feeling | Smart move |
|---|---|---|
| Breakaway starts | Hope rises | Fire 3 to 5 frames |
| Buffer slows | Panic hits | Ease off, reframe |
| Play resets | Calm returns | Check memory management |
| Chance builds again | You’re ready | Burst with control |
Good memory management means watching how long you shoot, timing your bursts, and giving the camera a breath. You’ll miss fewer key moments and feel like part of the sideline crew.
Choose Faster Memory Cards
Short, controlled bursts help your buffer last longer, and the card you use plays a big part in how quickly that buffer clears. Whenever you shoot action with burst mode, a slow card can stall your rhythm and make you miss the play your group came to capture. Choosing the right card helps you stay ready and confident on the sideline.
- Match speed ratings to your camera, so write speeds keep bursts flowing.
- Compare memory card types, since SD UHS-II, CFexpress, and XQD clear buffers at different rates.
- Buy reliable brands, because steady performance matters as much as top speed.
A fast card supports your camera at the moment frames stack up at 4 to 6 shots per second. It also protects your memory card lifespan, so you’re part of the action, not stuck waiting.
Set White Balance and Save a Preset
How do you keep skin tones, team colors, and stadium lights from turning your shots strange or dull? Start off by setting your white balance before the game begins. Should the light stay steady, use custom whitebalance instead of Auto, which can shift from frame to frame. That keeps uniforms true and faces natural, so your photos feel like the moment your crowd recalls.
Next, build a simple workflow you can trust. Aim your camera at a white or gray card under the venue lights, set the balance, then use preset saving so you can call it up fast next time. This matters even more in gyms and under mixed stadium lamps, where color can drift.
Whenever your camera responds the way you expect, you feel ready, connected, and part of the action with confidence.
Frequently Asked Questions
What Lens Focal Length Works Best for Different Sports?
Choose telephoto lenses such as 70 to 200mm or 300mm and longer for field sports, since they bring faraway plays into clear view. Pick wide angle lenses from 14 to 35mm for courtside coverage, crowd shots, or scenes that place the viewer inside the atmosphere. The best focal length depends on how much distance separates you from the action and how much of the environment you want in the frame.
How Can I Position Myself Safely Near the Action?
If you want dramatic shots, keep clear space between yourself and the action, use available barriers, and choose a spot beside official staff or team areas instead of directly behind them. This gives you a cleaner line of sight, more room to respond quickly, and better protection if the play shifts suddenly.
Should I Shoot RAW or JPEG for Sports Photography?
Shoot RAW when you need the most detail and wider editing control, especially for tricky lighting or heavy cropping. Choose JPEG when fast turnaround and smaller file sizes matter most during long bursts. RAW plus JPEG gives you a quick file for delivery and a RAW version for deeper edits later.
What Gear Helps Protect Equipment in Bad Weather?
About 60% of camera failures follow moisture exposure, so start with rain covers and sealed protective cases. Add a lens hood, microfiber cloths, and silica gel packs to help shield your gear from wet conditions and shared storage areas.
How Do I Photograph Sports Effectively From the Stands?
Photograph sports well from the stands by choosing a seat with an open view, steadying your camera, and reading the flow of play. Move through the crowd carefully, use burst mode for key moments, keep autofocus on continuous tracking, and set a fast shutter speed to freeze action.
