Dust spots on photos usually mean the camera sensor needs cleaning. Safe sensor cleaning starts with a dust check, the right tools, a full battery, and a tidy workspace. Then switch on cleaning mode, use a blower for loose debris, and use a swab for marks that stay behind. Done with care, the whole process is quick, simple, and far less scary than it sounds.
Check If Your Camera Sensor Is Dirty
How do you know whether your camera sensor is actually dirty and not just showing a smudge on the lens? Begin with a simple test shot. Set a high f-stop, photograph a bright plain surface, and review the image closely. In case the marks stay in the same place across frames, you likely need sensor inspection, not lens wiping.
Next, make spot identification easier through checking several photos, not just one. A dusty sensor usually shows small dark dots, especially in skies or white backgrounds.
Clean the lens initially, then retest so you don’t feel fooled by a fingerprint or haze. Provided your camera allows it, use a loupe for a careful look.
You’re not overthinking this. You’re learning the same smart habit careful photographers use to protect every shot you love.
Gather the Right Camera Sensor Tools
Once you’ve confirmed the spots are really on the sensor, gather the right tools before you open the camera body. Start with a rocket blower for loose dust, then keep a loupe nearby so you can check progress clearly.
Should you plan deeper cleaning, set out sensor swabs that match your sensor size and trusted cleaning solutions made for camera sensors.
You might also want gel sticks, but keep the silicone tip clean and capped until use. Some photographers like sensor brushes for dry debris, though they must stay spotless to be safe. Choose sealed, fresh supplies instead of improvised items. That way, you’ll feel prepared, confident, and part of the careful crowd that treats gear with respect.
With the proper kit in reach, the next steps feel calmer and much more manageable for everyone.
Prepare a Dust-Free Space and Battery
Before you open the camera, set yourself up in a clean, calm indoor space with good light, because the room matters just as much as the tools in your hand. Choose a table away from fans, open windows, and pet traffic. Moderate indoor humidity helps keep stray dust from floating everywhere. You want steady light, clear focus, and a routine that feels reassuring.
| Check | Why it helps |
|---|---|
| Bright room | You see dust and tools clearly |
| Full battery | Your camera stays stable during cleaning |
Charge your battery fully before you begin, especially in case you use a DSLR. A weak battery can interrupt the process at the worst moment. Keep spare cells nearby, but follow smart battery storage habits so every pack stays clean, dry, and ready. Once your space feels settled, you will too.
Turn On Your Camera’s Sensor Cleaning Mode
Open your camera’s manual sensor cleaning mode through the menu, because this step holds the shutter or mirror in the right position and gives you safe access to the sensor area.
Before you begin, check the manual, since DSLR and mirrorless steps differ. On a DSLR, the mirror flips up. On a mirrorless body, you might need to disable stabilization initially.
This is also a good moment to run automatic cleaning should your camera offer it, since that can shake off light dust before deeper care.
Make sure your battery is full, or the camera could shut down and close the mechanism unexpectedly. Keep the sensor exposed only as long as needed.
In case your camera maker has released software updates, install them at the outset, because menu paths and cleaning behavior can change on newer models.
Use a Blower to Remove Loose Sensor Dust
Start with a clean rocket blower, because it gives you safe, controlled air without the risks that canned air can cause.
Then hold your camera face-down so gravity helps loose dust fall out while you use a few short bursts around the sensor chamber.
In case you stay gentle and patient, you’ll lift away the easy dust initially and make the next cleaning step much safer.
Choose The Right Blower
Why does the blower matter so much? It’s your initial line of defense, and choosing well helps you clean with confidence.
The safest pick is a hand-squeezed rocket blower. It sends a gentle burst of clean air without the risky force, residue, or propellant found in canned air. Whenever you compare blower types, look for soft silicone, a one-way valve, and a tip that stays outside the camera chamber.
That choice also connects to blower maintenance. Provided your blower is dusty, cracked, or stored loose in a bag, it can push dirt right back where you don’t want it. Keep it capped, clean the exterior often, and replace it once it ages.
With a reliable blower in your kit, you’ll feel prepared, careful, and part of the savvy camera-care crowd.
Position Camera Properly
With the right blower in hand, the next step is to position the camera so loose dust has the best chance to fall out instead of drifting deeper inside. Hold your camera with the lens mount facing downward. This camera angle matters because it gives dust a clear path out of the chamber.
As you remove the lens or body cap, keep your hands steady and your workspace calm. You’re creating the safest setup before any air reaches the sensor area.
A downward position adds gravity assistance, which helps larger particles drop away instead of settling back inside. Tilt the body slightly so you can reach the chamber comfortably without turning it flat. That small adjustment keeps you in control and helps you clean with confidence, like someone who knows exactly what they’re doing today.
Use Short Air Bursts
Now that the camera is facing downward, use your rocket blower to send a few short, controlled bursts of air into the chamber so loose dust can fall out instead of swirling around inside. Keep the tip just outside the mount, and aim around the chamber, not directly into the sensor. This helps you stay safe and steady.
Next, pause and let gravity do some of the work for you. In case you use continuous blowing, you can stir dust up and push it deeper into corners.
You also don’t want an air compressor, because the force can damage delicate parts or blow moisture inside. Short bursts give you control, which is what careful camera owners rely on.
You’re doing the same safe step trusted on people who want their gear clean, protected, and ready for the next shoot.
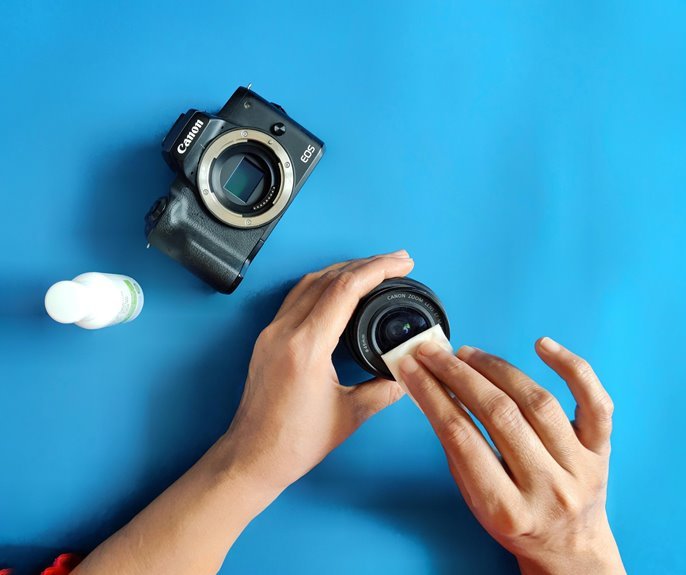
Swab the Sensor for Stubborn Dust Spots
In case dust spots still show up after blowing, you’ll need a sensor swab and a careful hand.
Add a couple of drops of cleaning solution to a fresh swab, then move it across the sensor in one smooth pass per side with light pressure.
Should a stubborn spot hangs on, use a new swab and repeat gently so you lift the debris without leaving streaks behind.
Proper Swab Technique
In case dust spots won’t budge with a blower, a sensor swab gives you the control you need to lift them safely. Start with a fresh swab sized for your sensor, then add two drops of solution should you be wet cleaning. Place the edge in one corner and move across in consistent strokes, staying parallel to the surface.
Next, flip the swab to the clean side and make one return pass. Use light, even pressure so you glide over the filter without grinding grit. Don’t scrub, pause, or retrace the same path with a dirty edge.
In the event you notice faint streaks after the wet pass, follow with a dry swab to clear residue. Work calmly, because careful technique helps you feel confident and keeps your camera ready for the group’s next shoot.
Removing Persistent Spots
Once a few dark spots still cling to your test shot after blowing out the chamber, it’s time to swab the sensor with calm, careful passes. You’re not alone here. Many photographers reach this step, and patience keeps the process safe.
Lightly moisten a fresh sensor swab with solution, then glide across once per side. Should marks remain, they might be oily dust or chemical residues, so use a new swab and repeat gently.
- Check your test shot after each pass.
- Stop in case you see streaks or added smears.
- Let the swab dry the surface briefly.
- Track cleaning frequency so you don’t overclean.
That rhythm helps you stay confident and connected to good habits. In the event stubborn spots still won’t move, it’s wise to trust a professional technician.
Test the Sensor and Prevent Future Dust
Before you put the lens back on, test the sensor so you know the cleaning actually worked and you don’t carry concealed dust into your next shoot. Set a lens to a high f-stop, photograph a bright plain wall or sky, then zoom in and check for spots. In case you still see marks, repeat the safest step that fits the problem.
Next, protect the clean sensor with smart habits. For strong dust prevention, change lenses indoors whenever possible, keep the camera facing down, and cap the body fast.
Practice touch avoidance every time, because your group of careful photographers knows fingers create trouble fast. Turn the camera off after cleaning mode, store clean caps, and keep your blower and swabs sealed. These small routines help you stay ready, confident, and part of the prepared crowd.
Frequently Asked Questions
How Often Should I Clean My Camera Sensor?
Clean your camera sensor when test shots show dust spots, not more often than necessary. Check it on a regular schedule, use a careful cleaning method, and follow the habits photographers use to keep equipment in good condition.
Can Sensor Cleaning Affect My Camera Warranty?
Sensor cleaning can affect your camera warranty if you go against the warranty terms or ignore the manufacturer’s instructions. Your coverage usually stays intact when you follow approved cleaning methods, keep records of maintenance, and use a qualified service center when you are not confident doing it yourself.
Is Professional Sensor Cleaning Worth the Cost?
Professional sensor cleaning is worth the cost when your priorities are lower risk, experienced handling, and a cleaner result. If you are not confident cleaning a sensor yourself, paying for the service can help protect your camera and give you more peace of mind.
Can Humidity or Weather Increase Sensor Dust Buildup?
Yes, humidity and weather can increase sensor dust buildup. Moist air helps particles stick inside the camera, and windy, cold, or very dry conditions can carry more debris into the camera during lens changes.
What Are Signs of Sensor Damage Versus Dust Spots?
Dust usually appears as small dark spots that show up in the same place at the same aperture. Sensor damage is more likely to look like streaks, a scratch, marks that remain after careful cleaning, or distortion in the image.