

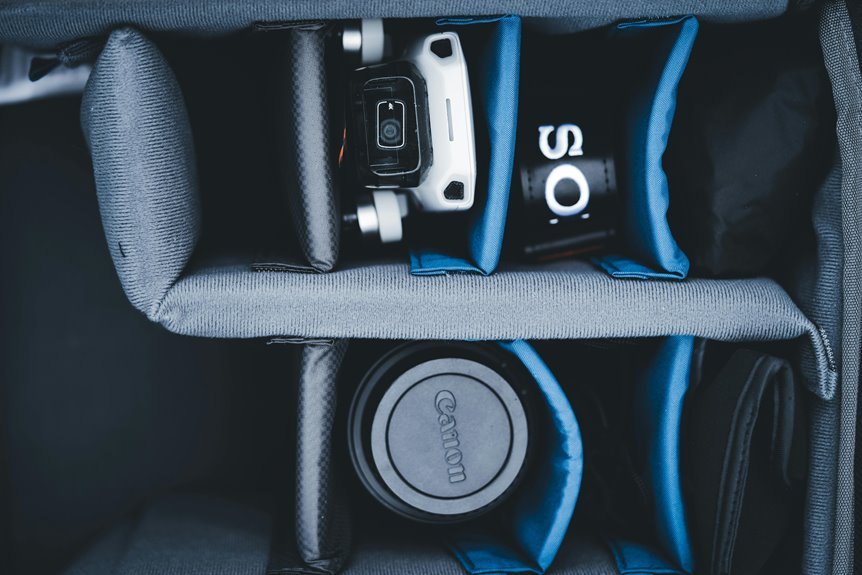

Good camera storage is simple: keep gear cool, dry, covered, and checked regularly. Dust, moisture, and stale air are the main threats, and a few daily habits stop most damage before it starts. Caps, dry cabinets, airtight cases, silica gel, and battery removal all help protect cameras and lenses. This guide shares seven easy rules to keep your gear clean, safe, and ready for the next shoot.
Store Camera Gear in a Cool, Dry Place
Because moisture is a camera’s quiet enemy, you’ll want to store your gear in a cool, dry place where humidity stays low and steady. That choice helps you protect equipment the way careful photographers in your circle do, and it builds smart habits fast.
For stronger humidity control, keep cameras and lenses in an air-conditioned room, a dry cabinet, or a sealed case with a reliable seal. In humid areas, add a room dehumidifier so moisture doesn’t linger around your setup.
Clear storage cabinets work well because light supports fungus prevention, while dark, damp corners invite trouble. Avoid closets, basements, and car trunks where heat and moisture swing wildly.
Whenever conditions stay stable, your gear stays ready, your lenses stay clearer, and you feel confident bringing your camera along every time.
Clean Your Camera Before Storage
A cool, dry storage spot works best once the camera you place there’s already clean. Before you put it away, give the body a careful pass with microfiber cleaning tools. A slightly damp, lint-free cloth handles fingerprints, salt, and grime without leaving bits behind.
That step matters even more after rain, beach trips, or humid days, because moisture and residue can cling to surfaces your photography circle relies on. Use gentle damp wiping on the exterior, then check grips, buttons, and seams where moisture likes to hide.
After cleaning, let your gear air dry fully. In case needed, set it in front of a fan for about an hour so trapped moisture can evaporate. Once you store only fully dry gear, you help your camera stay ready for the next shared shoot together.
Cover Lenses and Camera Openings
Next, protect your gear through putting rear caps on your lenses and sealing the camera mount every time you store it.
This simple habit keeps dust, moisture, and tiny debris out of the places that matter most. Once you cover every opening, you give your camera a safer place to rest and make your next shoot a lot less stressful.
Use Rear Caps
Peace of mind starts with a simple habit: put rear caps on your lenses and body caps on any camera opening as soon as you remove a lens. That quick step keeps dust, skin oils, and damp air away from the most sensitive parts of your gear. It also helps your setup stay ready for the next shoot, which makes you feel more confident and in control.
Just as lens caps and body covers protect the outside, rear caps protect the concealed side that matters just as much. Keep spare caps in your bag, on your shelf, and near your cleaning cloths, so you never feel stuck.
In case a cap drops, clean it before reuse. In every camera-loving circle, this small habit marks you as someone who truly cares for your gear.
Seal Camera Mount
Once you’ve built the habit of using rear caps, the next step is to fully seal every camera mount and opening the moment gear comes apart. That quick move keeps your setup safer and helps you feel like part of the careful crowd that protects gear well.
Cover the lens mount right away, then close battery doors, port covers, and body caps with care. A mount dustproof routine blocks floating grit before it settles on contacts or reaches the sensor chamber.
Also check the rubber around each opening. In case it looks dry, use only the right mount lubricant, and use very little. Too much attracts grime.
Whenever everyone around you treats open gear like a short-term emergency, storage gets cleaner, calmer, and far less risky, especially after humid shoots outdoors or travel.
Store Camera Gear in an Airtight Box
You should store your camera gear in a sealed airtight box, because the right container helps block the humidity that can quietly damage your equipment.
In case you only have a few items, a sturdy food storage box can work, but for stronger protection, you’ll want a rugged case with a tight seal. That simple step gives your gear a safer, drier space than a camera bag, which can trap moisture at times you least expect it.
Choose The Right Box
Because moisture can sneak into small spaces fast, the box you choose matters as much as the camera gear inside it. You want a container that feels dependable, like part of your care routine, not a random bin from the closet. Start with sturdy box materials such as thick plastic or hard resin, since thin walls flex and fail over time.
Next, check the seal, shape, and size together. A snug box keeps your camera, lenses, and batteries organized without wasted space that invites shifting.
For smaller kits, food storage containers can work well. For heavier setups, rugged cases offer stronger shells and better support.
Also, pay attention to locking mechanisms. Secure latches help the lid stay closed, especially whether you move gear often. That way, your setup stays protected and ready.
Seal Out Humidity
While a strong box gives your gear structure, an airtight box gives it real protection through blocking the damp air that quietly causes trouble. You want airtight seals because they create humidity barriers around lenses, bodies, and batteries, so your kit stays part of the safe, cared-for club.
As you move from choosing the right box to controlling the air inside it, focus on fit and closure. Don’t leave gear in camera bags, since fabric traps moisture. Use sealed food containers for small kits or rugged hard cases for larger setups.
| Box type | Best use |
|---|---|
| Food container | Small gear |
| Hard case | Pro kits |
| Tight latch | Better seal |
| Camera bag | Skip it |
When your storage closes firmly, you give your gear the dry, steady home it deserves every single day.
Add Silica Gel for Camera Storage
Silica gel is one of the simplest ways to protect your camera during storage, and it works through pulling excess moisture out of the air around your gear. In the event you store your camera in a sealed case, add enough packets to match the space, then check them often so they keep working well.
To make storage easier, use reusable, color changing silica gel. Once the beads shift from blue to pink, they’ve absorbed moisture and need reactivation. You can dry them in the microwave, then return them once they cool.
For larger boxes, try sock placement: pour a cupful of gel into a clean, tied sock with no holes. That keeps loose beads contained while helping your whole kit stay dry, safe, and ready for the next time you head out together.
Remove Batteries Before Long-Term Storage
Moisture control protects the outside of your camera, and removing the batteries protects the inside. Whenever you store your camera for weeks or months, take the batteries out initially. That simple habit helps you avoid battery corrosion, which can damage contacts and make your camera unreliable whenever you need it most.
Just as silica gel guards against damp air, this step guards your electronics. Batteries can slowly drain during storage, leading to power loss and sometimes swelling or leaks. You don’t want to open your case expecting a ready camera and find a sticky mess instead.
Through removing batteries, you keep the battery chamber clean, reduce stress on internal parts, and protect gear that matters to your creative life. It’s a small routine, but it’s one smart photographers trust and share with each other.
Inspect Stored Camera Gear Regularly
Regularly checking your stored camera gear helps you catch small problems before they turn into costly damage. Whenever you inspect your kit every few weeks, you stay connected to the tools that support your creative life. Look for dust, musty smells, sticky rings, or haze on glass. These initial condition checks help you spot moisture or fungus before they spread.
As part of your regular maintenance routine, open each case, handle every item, and confirm seals still close tightly. Then check silica gel packets, recharge or replace them in case they’re needed, and make sure nothing feels damp.
Provided you use a dry cabinet or airtight box, verify humidity stays steady. This simple habit gives you peace of mind and keeps your gear ready whenever your community calls you out to shoot.
Frequently Asked Questions
How Long Can a Camera Remain Unused Without Damage?
A camera can sit unused for months or even years if it is stored properly. Humidity above 60% can accelerate sensor degradation. To preserve battery health, check the charge level periodically so the camera stays dependable.
Should Memory Cards Be Removed Before Storing Camera Gear?
Yes, remove memory cards before storing camera gear. Taking them out lowers the risk of file loss, limits strain on the card slot, and gives you a chance to confirm the card is ready for your next shoot. This small step protects your footage and keeps your kit ready to use.
Is It Safe to Store Cameras in a Refrigerator?
No, a refrigerator is not a good place to store cameras because it can cause condensation and repeated temperature shifts. A sealed container in a cool, dry place with desiccant packs is a safer way to protect camera gear.
Can Fungus Spread From One Lens to Another?
Yes. Fungus on one lens can contaminate another when both are stored close together in a damp space. Separate any affected lens from the rest of your gear and keep storage areas dry to reduce the chance of spread.
What Humidity Level Is Ideal for Camera Storage?
Keep camera storage at 40 to 50 percent relative humidity. That range helps limit excess moisture while reducing the risk of fungus growth and protecting sensitive gear.
