

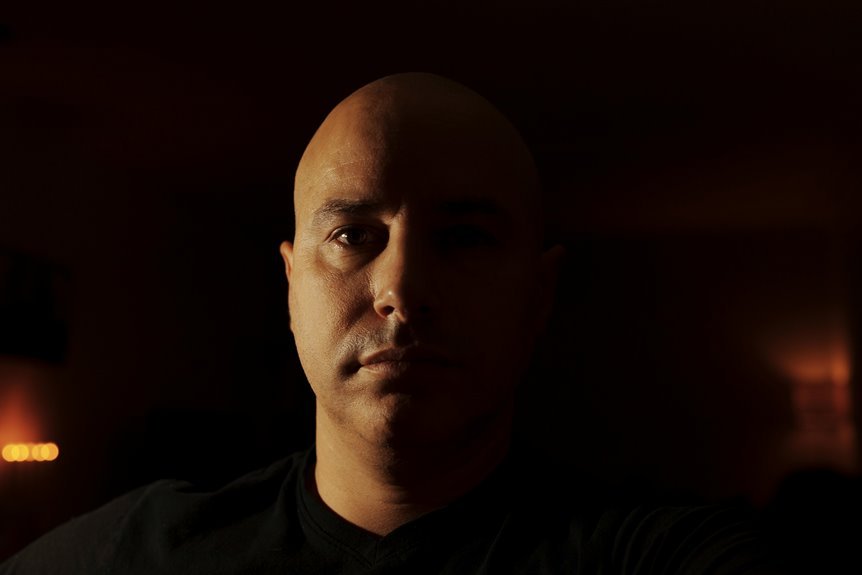

Fill flash softens harsh outdoor shadows by adding a gentle touch of light to your subject’s face. It works best in bright sun, especially with backlit portraits that leave eyes and skin too dark. A low flash setting keeps the effect natural instead of flashy or flat. With a few small adjustments, outdoor portraits can look bright, balanced, and easy on the eyes.
When to Use Fill Flash Outdoors
In case the sun is bright and your subject’s face falls into deep shadow, fill flash is one of the easiest ways to save the shot without making it look fake. You’ll want it whenever the background looks great, but your person feels lost in shade. That happens at noon, under hats, or with strong backlight.
Even in open shade, faces can still look dull, especially provided the sky is bright behind them. In those moments, fill flash helps your subject look present, warm, and connected.
It also works whenever reflector placement isn’t practical, like during quick family photos or crowded events. You’re not trying to overpower daylight. You’re gently lifting shadow so everyone looks like they belong in the same beautiful scene, with clear eyes, soft skin, and a natural smile.
Position Fill Flash for Softer Light
Because fill flash works best as a gentle helper, where you place it matters just as much as how much power you use. Keep the light close to your lens for soft, friendly fill, then shift it slightly off-center whenever you want more shape without hard edges. A small change in flash angle can make faces look more open and welcoming.
- Raise the flash a little above eye level so shadows fall down, not sideways across cheeks.
- Turn the flash from the brightest sun side toward the shadow side to gently lift detail and keep features balanced.
- Watch diffuser placement, because a diffuser works best at the moment it’s between the flash and your subject, close enough to soften light without blocking your frame.
With practice, you’ll feel more connected, confident, and in control outdoors.
Set Fill Flash Power to Look Natural
Start with low fill flash power, because you want the light to gently lift shadows instead of shouting, “I used flash.”
Then balance your flash with the ambient light so your subject still looks like they belong in the scene.
As you test and adjust, watch how different skin tones react, and make small changes until the light looks soft, even, and real.
Start With Low Power
Once you add fill flash outdoors, keep the power low initially so your subject still looks like they’re lit with daylight, not through a camera burst. That small start helps you stay in control and keeps skin tones believable.
In case your flash is too strong, faces can look flat, shiny, or obviously flashed, which can make your photo feel less welcoming.
- Begin around -1 or -2 EV, or use manual power at 1/16 or 1/32.
- Take a test shot, then nudge the flash up only on the condition that shadows still distract.
- Lower power also improves flash recycling, so you won’t keep your subject waiting between frames.
This gentle approach helps you create portraits that feel easy, flattering, and true to the moment. Your subject stays comfortable, and your photos keep that natural, connected look people love.
Balance Flash And Ambient
While low power is a smart place to begin, the real goal is to match your flash to the daylight so your subject looks gently lifted, not obviously lit. Start with exposing for the scene initially, then add flash just enough to open the shadows. That creates ambient balance, so your photo still feels like the moment everyone shared.
Next, watch how the face and background relate. In case the flash pulls too much attention, lower it a bit. Should the eyes sink into shade, raise it slightly. This kind of flash layering keeps the sunlit background believable while helping your subject feel present and connected.
You want people to look at the expression, not the lighting. Once your fill blends in, your image feels warm, natural, and welcoming, like your subject truly belongs there.
Fine-Tune For Skin Tones
Because every face reflects light a little differently, your fill flash power should match the person in front of you, not just the meter on your camera.
Whenever you fine-tune flash, you help skin look real, warm, and welcoming instead of flat or shiny. That matters whenever you want portraits everyone feels good seeing.
- Start around -1 EV, then check the face, not only the histogram. In case highlights look chalky, lower power.
- Watch skin undertones closely. Golden, olive, deep, and cool complexions bounce light in unique ways, so small changes protect color accuracy.
- Zoom into your preview and study cheeks, forehead, and under-eye shadows. In the event flash wipes out texture, back it down. Provided shadows still feel heavy, raise it slightly.
With gentle adjustments, you create natural light that helps people feel seen, comfortable, and included.
Use Flash Compensation to Open Shadows
You can dial in flash compensation to gently lift the dark areas without making your subject look overlit.
As you balance flash with the ambient light, you’ll keep the background natural while opening shadows on the face. From there, you can fine-tune the shadow lift until the light looks clean, soft, and just right.
Dial In Compensation
Should harsh sunlight carve dark lines across a face, flash compensation gives you a simple way to lift those shadows without making the photo look flashy. You stay in control, and your subject still looks like themselves, just brighter and more welcoming.
A small compensation adjustment often does the trick.
- Start at -1 EV. This lowers flash exposure so the light fills gently, not harshly.
- In case shadows still feel heavy, move toward -2/3 or -1/3. Tiny changes matter, and you’ll quickly feel part of the rhythm.
- Watch faces, not just the screen. In case skin looks flat or shiny, pull power back a little.
That approach helps you keep texture, eye sparkle, and a natural outdoor feel.
Soon, dialing flash compensation will feel easy, like second nature with friends.
Balance Flash And Ambient
Flash looks best outdoors as it supports the sunlight instead of fighting it. Whenever you set ambient exposure initially, you give the scene a natural base, then let flash gently lift the face. That keeps your photo feeling like it belongs in the same light everyone else sees.
Next, use flash compensation to brighten shadows without making your subject look pasted in. A small reduction, often around minus one to minus two, usually feels right and keeps skin believable.
As you work, watch how ambient exposure and flash power share the job. In case the background looks right, let flash only open the darker areas. Also check flash synchronization so your shutter and flash stay in step. Once they do, you’ll get cleaner balance, softer contrast, and a look that feels easy, polished, and natural.
Fine-Tune Shadow Lift
Once your ambient exposure looks right, flash compensation becomes the gentle control that opens facial shadows without making the light look forced. That’s where you start shaping a natural, welcoming portrait.
Instead of blasting light, you’re nudging it, so your subject still feels part of the scene.
- Start around -1 EV, then check the face. You want shadow smoothing, not a flat mask.
- In case the eyes still look dark, raise flash compensation in small steps. This contrast adjustment keeps features clear while protecting bright skin.
- Watch the cheeks, nose, and chin together. Whenever those areas match, your fill looks believable and your subject feels comfortably seen.
You’re aiming for subtle help, not spotlight energy. A tiny tweak can make someone look relaxed, connected, and beautifully lit outdoors in portraits.
Balance Fill Flash in Backlit Scenes
How do you keep a bright sky behind your subject without leaving their face too dark? Start off exposing for the background initially, then add just enough flash to lift facial shadows. That keeps the sky rich, preserves rim lighting around hair and shoulders, and avoids turning your subject into a subject silhouette.
Next, place your subject with the sun behind them so they stay comfortable and don’t squint. After that, use fill flash at low power, often around minus one or minus two EV, so the light blends in. You’re not trying to overpower daylight. You’re simply helping your subject belong in the scene.
Watch the face, especially the eyes, and adjust flash compensation in small steps. At the moment you do, your portraits feel balanced, warm, and naturally connected outdoors.
Avoid the Harsh Fill Flash Look
A balanced fill flash setup can still look fake in case the light is too strong or too direct, so the goal now is to keep it soft and nearly invisible. You want people to notice the person, not the flash.
That’s where small changes help you blend in with photographers who make outdoor portraits feel natural and welcoming.
- Lower flash power initially. Start around minus 1 or minus 2 EV so shadows lift without flattening the face.
- Use diffuser techniques to spread light gently. Even a small diffuser can soften skin and keep catchlights natural.
- Check reflector placement with care. A white reflector on the shadow side can add fill, so your flash doesn’t have to do all the work.
Then step back and review. Should flash jumps out, reduce power or change angle slightly.
Frequently Asked Questions
Can Fill Flash Drain Camera Batteries Quickly During Outdoor Sessions?
Yes, fill flash can drain camera batteries faster during outdoor sessions, especially when the flash fires often. Battery life usually stays manageable if you use low flash power, such as minus 1 to minus 2 EV, and bring spare batteries.
Does Fill Flash Work With Sunglasses or Hats on Subjects?
Yes, fill flash still works when subjects wear sunglasses or hats, and those are often the moments when it helps the most. It can reduce deep shadows under hat brims and, with careful adjustment, limit glare on sunglass lenses.
Should Beginners Use TTL or Manual Flash for Outdoor Portraits?
Begin with TTL for outdoor portraits if you want faster setup and less guesswork as the light changes. Switch to manual when you need repeatable output and tighter control over flash exposure. Both modes are useful, and knowing when to use each will make your lighting more reliable.
Can Smartphones Use Fill Flash Effectively in Bright Sunlight?
Yes, most smartphone users can improve portraits in bright sun with fill flash, though phone flashes have clear limits. Start by setting exposure for the background, then fine tune ambient light and add a small amount of flash so faces look natural.
How Does Fill Flash Affect Skin Tones in Midday Portraits?
Fill flash softens harsh midday shadows, keeps skin tones from looking dull or uneven, and helps faces hold their natural color in bright sun. With low flash power, skin usually needs less correction afterward, and groups tend to look balanced instead of patchy or over-contrasted.
