

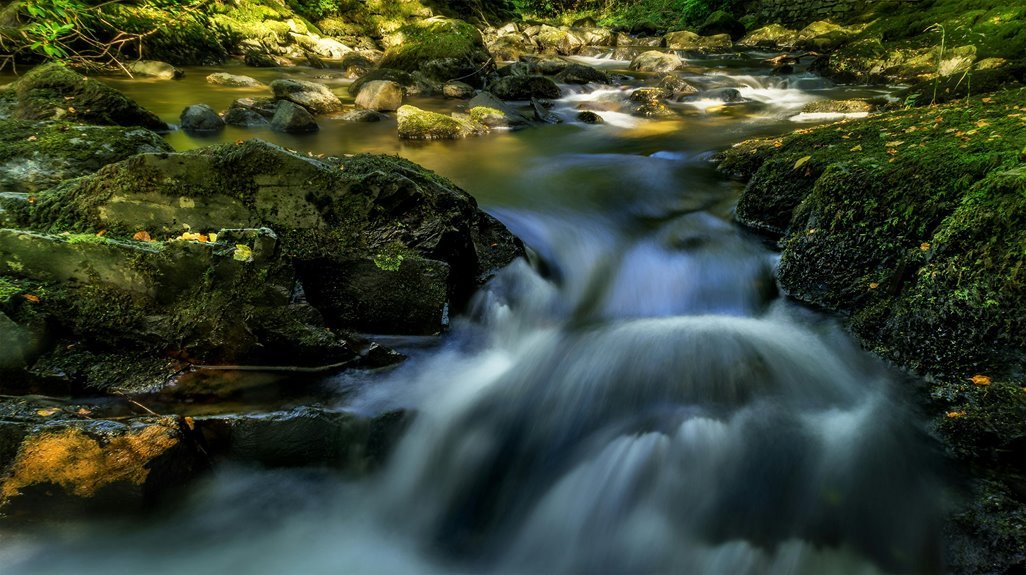

Long exposure is all about using a slow shutter speed to turn moving water silky and car lights into smooth streaks. The key settings are shutter speed, ISO, aperture, focus, ND filters, Bulb mode, and white balance. Get those working together, and your photos start to look clean, dramatic, and polished. It sounds technical at the start, yet a few simple adjustments can make the whole process feel easy.
Choose the Right Shutter Speed
How long should you leave the shutter open? You’ll choose that according to the look you want, and that’s where you start feeling like you truly belong behind the camera.
For light trails, use a slow shutter of at least 10 to 15 seconds, then go longer in case the scene is dim. For water, 1/4 second gives gentle movement, while 1/4 to 1/10 second keeps some texture. In case you want dreamy mist, extend to 2 to 10 seconds. On beaches, around 3 seconds creates smooth, flowing trails.
A fast shutter freezes motion, but long exposure work asks you to slow down and trust the scene. As the light changes, adjust your timing with care. Soon, you’ll know exactly at what point to hold detail and at what point to let motion melt beautifully into the frame.
Set a Low ISO for Cleaner Shots
Once you’ve chosen the shutter speed that gives the motion you want, set your ISO as low as possible so the rest of the image stays clean and crisp. For most cameras, ISO 100 is your best starting point, and in case your camera offers ISO 64, you can stretch exposure time even more while keeping detail strong.
That matters because long exposures can reveal image noise fast, especially in shadows and darker skies. Whenever you raise ISO, you add high sensitivity, but you also invite grain, rough color, and less vibrant range.
Keeping ISO low helps your photo feel polished and calm, which is exactly the look many long exposure shooters chase. You’re not guessing here. You’re using a trusted habit that helps your images look more professional, more consistent, and more like the work you’re proud to share.
Choose the Best Aperture for Sharpness
After setting a low ISO, your next job is choosing an aperture that keeps the scene sharp without hurting image quality. For most long exposures, you’ll get the best balance at f/8 to f/11. That range often gives strong lens sharpness, enough depth, and clean detail across rocks, water, and city scenes.
From there, stop down only once you truly need more depth or a slower shutter. Many photographers in our community lean on f/11 because it’s reliable and forgiving.
Still, pushing to f/16 or f/22 can soften fine detail because of diffraction effects. That means your image might lose crisp texture, even on a sturdy setup. Should you want smooth water or longer light trails in bright conditions, keep aperture in the sweet spot and use an ND filter instead whenever light stays too strong outside.
Switch to Manual Focus Before Shooting
Because long exposure shots give your camera more time to record every tiny shift, accurate focus matters just as much as shutter speed and aperture. Prior to pressing the shutter, focus on your subject, then switch your lens to manual. That simple move prevents autofocus issues once the scene darkens or moving water confuses your camera.
| Step | Why it helps |
|---|---|
| Focus initially | You start sharp |
| Use single point | You stay precise |
| Confirm focus lock | You avoid drift |
| Switch to MF | You keep focus set |
That small routine helps you feel in control, especially whenever everyone wants crisp rocks and dreamy motion. Should your camera hunts, zoom in on the screen, check details, and refine focus manually. You’ll trust your setup more and shoot like you belong out there.
Use ND Filters in Bright Daylight
Should you shoot long exposures in bright daylight, an ND filter becomes the tool that makes the shot possible. It cuts light so you can keep shutter speeds slow without blowing highlights. That means you can stay at ISO 100 and use f/8 to f/11 for strong image quality while your water turns silky or your light trails stretch cleanly.
Because you want control, learn a few filter types. A 3-stop filter helps in softer light, while a 6-stop or 10-stop option gives you more reach at midday.
For clean results, compose and focus before you attach the filter, then make your brightness adjustment with your meter and histogram. Paired with a sturdy tripod, an ND filter helps you create the polished, connected look so many photographers love and proudly share.
Use Bulb Mode for Very Long Exposures
If your camera’s standard shutter limit isn’t long enough, you can switch to Bulb mode and hold the shutter open for as long as the scene needs.
You’ll get the best results once you pair Bulb mode with a remote shutter, because it lets you start and stop the exposure without shaking the camera. That extra control helps you handle very dark scenes with more confidence and far less stress.
When To Use Bulb
How do you know it’s time to switch to Bulb mode? You use it whenever your camera’s standard shutter limits stop you from reaching the look you want.
In case light trails need more than 10 to 15 seconds, or water needs several seconds to turn silky, Bulb gives you creative control and exposure flexibility.
That matters most in low light, at blue hour, sunrise, sunset, or with strong ND filters in daylight.
You’ll often pair Bulb with ISO 100 and an aperture around f/8 to f/16 so you can stretch time without blowing highlights.
As you grow, Bulb helps you match the scene instead of forcing the scene to fit the camera.
That’s a big step, and you’re not alone.
It’s how many photographers join the long exposure crowd confidently.
Remote Shutter Control
A remote shutter release is your steady hand during very long exposures in Bulb mode. Whenever you press the camera button yourself, even a tiny shake can soften rocks, skylines, and reflections. A remote keeps your setup still, so you stay in control and feel more confident beside other long exposure shooters.
As your exposure time stretches past 30 seconds, Bulb mode lets you hold the shutter open as long as the scene needs. That’s at which point wireless triggers and cable releases really help. You can start and stop the exposure without touching the camera.
Some remotes also lock the shutter, which saves your fingers during cold nights and late sunsets. Pair your remote with a sturdy tripod, and you’ll get cleaner light trails, smoother water, and sharper details that make your images feel proudly yours.
Set White Balance for Water and Light Trails
Although shutter speed and filters shape the look of a long exposure, white balance controls the mood you feel in the final image. Once you set it well, your water looks clean and your light trails feel true to the scene. Start with Kelvin so you can guide color temperature with purpose. Cooler settings make water feel crisp. Warmer settings make city trails feel inviting. Should green or magenta creeps in, use tint adjustment to bring everyone back into harmony.
| Scene | White Balance | Result |
|---|---|---|
| Waterfalls | 5200K | Natural whites |
| Blue hour streets | 3800K | Cleaner blues |
| Sunset shore | 6000K | Warmer glow |
| Mixed city lights | Custom plus tint | Balanced color |
Shoot RAW once you can, because it gives you room to belong with the light later.
Frequently Asked Questions
How Do I Reduce Condensation on the Lens During Long Exposures?
Cut condensation by attaching a lens hood, raising lens temperature slowly, and applying anti fog wipes or a gentle warming wrap. Seal the camera and lens in a closed bag before moving between warm and cold air, and keep your breath away from the front element.
Should I Enable or Disable In-Camera Long Exposure Noise Reduction?
Turn it off for most exposures. You keep full control over noise reduction in post, avoid the camera’s extra wait time, and preserve finer detail. Turn it on only for very long exposures when you cannot record or apply dark frames later.
How Can I Prevent Battery Drain During Extended Nighttime Shooting?
Reduce battery drain at night with specific power habits: dim the screen, turn off WiFi, keep spare batteries warm in an inside pocket, switch on battery saving mode, and limit image playback. These steps extend shooting time and keep your camera ready after dark.
What Weather Conditions Are Unsafe for Tripod-Based Shoreline Photography?
Unsafe conditions include strong winds that can topple a tripod, heavy rain that reduces visibility, lightning, storm surge, large breaking waves, icy or slippery rocks, and tides that rise quickly enough to cut off your exit. If the shoreline becomes unstable or hazardous, stop shooting, stay with your group, and move to a safe location.
How Do I Clean Salt Spray From Camera Gear After Beach Shooting?
After beach shooting, remove salt spray right away using a microfiber cloth lightly moistened with fresh water, then dry each item completely. To protect lenses and reduce corrosion, clean seals carefully, take out the batteries, and store the gear with desiccant packs.
