

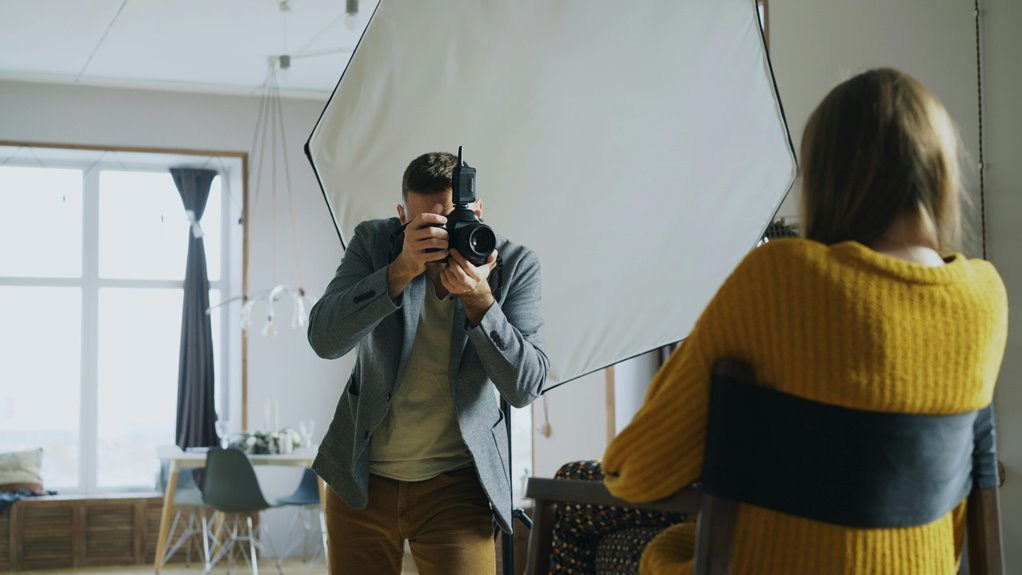

Soft, flattering natural light comes from gentle light, not the brightest light in the sky. The best spots are golden hour, open shade, and windows softened with a sheer curtain. Small changes in position and exposure can make skin look smoother and shadows look softer. A simple reflector can lift dull shadows and give portraits a clean, natural glow.
Choose the Best Time for Soft Light
At the moment you choose the right time of day, natural light gets much easier to work with and your photos instantly feel softer and more flattering. You’ll feel more confident, too, because the light is finally on your side instead of fighting you.
Start with golden hour, just after sunrise or before sunset. That light wraps around faces gently and gives skin a warm, welcoming glow. It also helps everyone look relaxed and connected.
For midday avoidance, plan your session earlier or later, since harsh noon sun creates strong shadows and squinting. On cloudy days, you’re in luck, because the sky softens everything for you. Then, as evening arrives, try sunset positioning with your subject turned toward the low sun or slightly angled to it for a calm, dreamy look.
Find Open Shade for Even Light
Once you step into true open shade, you give your subject softer light and smoother skin tones without the harsh shadows of direct sun.
You’ll get even better results should you notice nearby white walls, sidewalks, or light concrete, because they can bounce gentle light back onto the face.
As you frame the shot, keep an eye on bright backgrounds too, since they can pull attention away from your subject and make exposure harder to control.
Identify True Open Shade
How do you know you’ve found true open shade? Look at your subject’s face initially. In case the light feels soft, even, and calm, you’re close. True open shade still faces a bright sky, so it stays luminous without harsh sun.
You shouldn’t see strong shadow contrast across cheeks, noses, or under eyes. Provided one side of the face looks much darker, step farther from the sun’s reach.
Next, check what’s creating the shade. A porch, doorway, tree line, or building can work, but artificial shade isn’t always true open shade.
In the event the subject is tucked too deep under a roof or dense branches, the light might turn dull or patchy. You’re looking for shelter from direct sun while keeping a clear view of open sky above or ahead.
Use Nearby Reflective Surfaces
Because open shade can still look a little flat, nearby reflective surfaces can gently lift the light and make skin look brighter, softer, and more alive. Whenever you notice a pale wall, sidewalk, or even a light shirt nearby, you can use it as a natural helper. That bounce fills shadows without ruining the calm feel you worked to find.
- White walls add soft, clean fill and keep color temperature neutral.
- Light concrete can brighten faces, but check whether it cools skin too much.
- Warm wood can add cozy glow, which helps people feel connected and welcome.
- Smooth or rough surface texture changes the bounce, so test your angle.
As you adjust position, you’re shaping light with what already surrounds you. That makes your portraits feel more natural, relaxed, and beautifully shared.
Watch Background Brightness
Even in soft shade, a background that’s much brighter than your subject can pull attention away and make skin look dull or underexposed. To keep portraits warm and welcoming, watch background exposure and protect your subject initially. Open shade works best whenever both your subject and background sit in similar light, which improves contrast balance and helps everyone feel naturally seen.
| Scene | Feeling | Fix |
|---|---|---|
| Bright path behind | You feel disconnected | Turn toward darker trees |
| Pale wall glowing | Skin loses life | Shift a few steps sideways |
| Sun patch nearby | Eyes chase brightness | Reframe and simplify |
| Even shaded backdrop | You feel centered | Expose for skin |
As you move, check edges of the frame too. Small brightness changes can make a portrait feel calm, close, and beautifully together.
Use Window Light for Soft Portraits
Once you use window light, you can get soft, flattering portraits without fighting harsh sun.
Start by choosing a large north- or south-facing window, then place your subject a few feet from it so the light wraps gently across the face.
Should the light feel too strong, you can soften it with sheer curtains and create a calm, natural look.
Choose The Right Window
For soft portraits, the best window is one that gives you steady, gentle light instead of sharp sun patches across the face. You’ll usually feel most at home with light that stays calm, because it helps skin look smooth and expressions feel natural. Pay attention to window direction and window texture, since both shape how welcoming the light feels.
- North or south windows usually stay even longer.
- Sheer curtains add soft window texture and calm bright glare.
- Bigger windows create broader light that feels more forgiving.
- Clean, uncluttered glass keeps color simple and flattering.
As you choose, notice how the room feels too. White walls can bounce light softly, while overhead bulbs can spoil the mood, so switch them off. A good window helps you create portraits that feel warm, honest, and beautifully connected.
Position Subject Carefully
A good window gives you the light, but your subject’s position is what makes that light look gentle on skin. Place them about two to four feet from the window so the light wraps softly instead of flattening features. Then turn their face slightly toward the window for bright eyes and a calm, welcoming glow. In case shadows feel strong, move them closer to the shadow-light edge for a smoother look.
Next, guide small shifts in shoulders, chin, and hands to build natural pose energy without making anyone feel stiff or singled out. Keep backgrounds a bit darker so your subject feels connected and clearly seen.
Most of all, support subject engagement through talking, encouraging, and watching for relaxed expressions. Whenever people feel comfortable with you, they settle in, and the portrait feels warm, honest, and quietly beautiful.
Control Light With Curtains
Because window light can change fast, a simple curtain gives you steady control and much softer portraits.
Whenever you shape sunlight this way, your photos feel calmer, kinder, and more like the look you want to share.
Sheer curtain textures spread bright rays evenly, while heavier fabric colors can warm or cool the mood.
You don’t need a fancy studio to belong here. Your window can become one.
- Use sheer panels to diffuse harsh light and smooth skin tones.
- Try white or cream fabric colors for clean, natural faces.
- Place your subject 2 to 4 feet from the window for gentle wraparound light.
- Turn off overhead bulbs so your curtain-filtered light stays soft and true.
As the light shifts, slide the curtain open or closed a little. That small move keeps portraits flattering and beautifully consistent.
Position Your Subject for Flattering Light
Once you place your subject in the right spot, natural light starts working with you instead of against you. Start upon turning your subject toward the sun for direct frontlight whenever you want smooth skin tones and fewer shadows.
In case you want more shape, rotate them slightly and use side lighting to define cheeks and jawlines without looking harsh.
From there, watch how the light falls across the face. A small step can change everything. Try placing your subject at the edge of shade, where light feels gentle but still directional.
Indoors, move them two to four feet from a window so the light wraps softly and adds depth. You can also place the sun behind them for a bright rim of light, then shoot from an angle to keep faces flattering and connected.
Diffuse Harsh Sun for Softer Photos
At the moment the sun feels too strong, you can move into open shade to get softer, more even light right away.
In case you still need help, hold up a scrim, a thin sheet, or even a curtain to tame the harsh rays and calm those sharp shadows. Then you can reposition your subject bit stepwise until the light looks smooth, flattering, and easy on the eyes.
Use Open Shade
In case harsh sun is making your photos look too bright and shadowy, open shade can save the shot. You’ll get softer skin tones, gentler contrast, and a more welcoming feel that helps people relax and look like themselves.
- Look for shade near bright open sky, like a porch, doorway, or building edge.
- Place your subject facing the open sky so light wraps evenly across the face.
- Watch the shadow texture on cheeks and under the chin. It should look smooth, not sharp.
- Notice the cool temperature in open shade, then adjust white balance in case skin looks too blue.
This approach keeps everyone comfortable, especially at midday. It also helps your group feel connected, because no one’s squinting, sweating, or fighting hard light. You’re creating a space where people belong.
Soften With Scrims
Open shade works well, but sometimes you’re stuck in direct sun and still want soft, flattering light. That’s where portable scrims help your group feel prepared, not stressed. You place a diffuser between the sun and your subject, and the light instantly turns gentler. Better yet, the scrim closer to your subject creates smoother skin tones and softer shadows.
| Scrim use | Result |
|---|---|
| Overhead diffusion | Softer forehead and eye shadows |
| Side diffusion | Gentler contrast on cheeks |
| Sheer scrim materials | Airy, natural skin texture |
| Household linens | Budget-friendly softness outdoors |
If you’re building your kit, start simple. Portable scrims fold small, travel easily, and help everyone look their best without fighting the sun. Even DIY scrim materials, like white sheets or ripstop nylon, can make portraits feel calm and inviting.
Reposition For Evenness
One simple move can fix a lot of harsh sunlight problems: shift your subject into more even light instead of fighting the sun where they stand. You don’t need perfect weather to make people look their best. You just need to notice where the light source becomes gentler, like open shade, a wall’s reflected glow, or the edge between sun and shadow.
- Step a few feet back until bright patches leave the face.
- Turn your subject so both cheeks receive even illumination.
- Use nearby pavement, walls, or sand to bounce softer fill.
- Watch the eyes and skin. In case they relax, you’re closer.
This small adjustment helps your subject feel comfortable, connected, and seen. And whenever your light feels kinder, your photos do too, which helps everyone feel they belong in the frame.
Expose for Flattering Skin Tones
Because skin is what people notice initially in a portrait, your exposure should protect it before anything else in the frame. Whenever you watch the face initially, you help people look like they belong in the photo, not lost inside bright distractions. Aim to keep skin bright, gentle, and believable, especially on cheeks, forehead, and nose.
That means practicing highlight control so bright spots stay soft instead of shiny or harsh. In case the background turns a little darker, that’s often a good trade, because your subject still feels warm and connected.
You also make later color grading easier when skin starts clean and balanced in camera. Look for a healthy glow, soft detail, and smooth shifts across the face. As soon as skin looks cared for, your portraits feel welcoming, polished, and true to the person there.
Set Exposure and White Balance Correctly
While beautiful light sets the mood, your exposure and white balance are what make skin look natural instead of too dark, too orange, or washed out. As soon as you dial them in, your photos feel welcoming and true, like the moment belongs to everyone in it.
- Use manual exposure so faces stay consistent from frame to frame.
- Watch skin initially, not the background, because connection matters more than scenery.
- Set custom whitebalance whenever window light shifts, especially after turning off mixed indoor bulbs.
- Check your LCD and histogram together, so you can catch cool, warm, bright, or dull tones at the outset.
That simple habit helps you create images people recognize themselves in. And when your color and brightness feel right, your subject relaxes, trusts you, and looks beautifully at home.
Use Reflectors to Shape the Light
Once your exposure is set, a reflector gives you a gentle way to guide the light instead of fighting it. You don’t need fancy gear to feel in control. A simple white board, silver disc, or even a light wall can lift shadows and keep skin soft.
That’s where bounce control helps. You can aim light into cheeks, under eyes, or along the jaw for a kinder, more even look.
As you grow more confident, notice how different reflector materials change the mood. White gives a natural fill, silver adds brightness, and gold brings warmth whenever a face feels cool.
Keep the reflector close for smoother light, then pull it back in case the effect feels too strong. With a little practice, you’ll feel like part of the light, not stuck against it.
Choose Backgrounds That Complement Light
A good background doesn’t just sit behind your subject, it works with the light to make your photo feel clear, calm, and intentional. Whenever you match light with the right setting, your images feel more welcoming, like your subject truly belongs there.
Soft light loves simple scenes, gentle background texture, and tones that support skin without pulling attention away.
- Pick backgrounds with color harmony, so warm or cool light feels natural.
- Use darker areas behind your subject to help them stand out softly.
- Look for clean walls, foliage, or fabric that reflect the mood you want.
- Avoid busy patterns that compete with faces and make the frame feel crowded.
As you compose, notice how light falls across both subject and setting. Whenever they work together, your photo feels easier to connect with and trust.
Fix Common Natural Light Mistakes
Even beautiful light can go wrong in case a few small choices get missed, so this is where you can clean up the problems that make photos feel harsh, flat, or distracting.
In the event faces look shiny, eyes squint, or shadows cut across cheeks, avoid midday and move into open shade or wait for softer light.
Then check direction. Once light hits straight overhead, your subject can seem tired, even if they’re having fun. Turn them toward a window, the sky, or the bright edge of shade for gentler shaping.
In case the background feels brighter than the face, use careful backlight positioning and shoot from a slight angle. That keeps features soft while adding glow.
Also watch mixed indoor bulbs, because they can make skin look off, and your photos feel less natural and welcoming.
Frequently Asked Questions
Can Natural Light Photography Work Well for Black-And-White Portraits?
Yes, natural light can produce striking black and white portraits when you pay close attention to contrast and shadow detail. Window light, overcast conditions, and the softer light near sunrise or sunset can help create gentle tones and clear expression.
What Lens Focal Length Flatters Faces Most in Natural Light?
Faces often look most balanced at 85mm to 135mm because these focal lengths soften perspective and keep features from appearing stretched. When space is limited indoors, 50mm gives a natural sense of closeness without making the portrait feel cramped.
How Do I Photograph Multiple People With Consistent Natural Lighting?
Place everyone in open shade or near a large window, keep them on the same plane, and angle faces in a similar direction so the light stays even across the group. Add a reflector to soften shadows and keep every person lit in a natural, unified way.
When Should I Use a Tripod for Natural Light Portraits?
Use a tripod when natural light is dim, during long exposures, or whenever your shutter speed is slow enough to introduce camera shake. It helps keep your portraits crisp, gives you steadier control while shooting, and supports a cleaner final image.
How Can I Make Subjects Feel Relaxed During a Natural Light Shoot?
You help subjects relax by beginning with a short conversation before the session, which builds trust from the first moments. You shape a calm atmosphere, offer simple guidance they can follow without overthinking, keep the interaction natural, and remind them they look right at home in front of the camera.
