

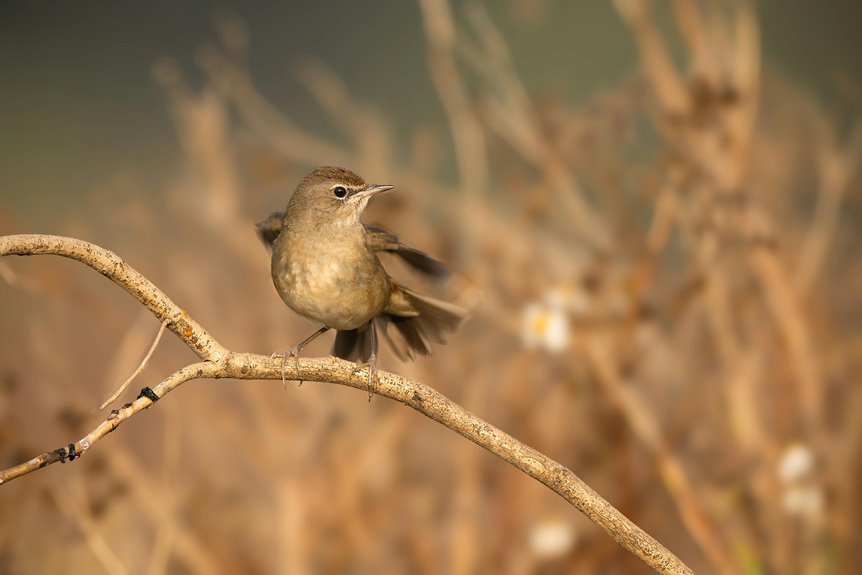

Freezing bird motion comes down to a few smart camera settings. Use a fast shutter speed, reliable autofocus, and an aperture that gives you enough detail. Raise ISO as needed to keep those settings working in changing light. With the right setup, birds in flight and quick hops look much sharper and stay in focus.
Choose a Fast Shutter Speed for Birds
Because birds can change direction in a blink, your shutter speed has to do the heavy lifting should you want crisp feathers instead of blur. To stay in step with other bird photographers, start at 1/1600 second for active birds and move to 1/2000 or faster for flight. In case the bird fills your frame, 1/3200 gives wings a better chance of looking sharp.
For calmer moments, 1/500 second is a safe floor because your hands still add movement. A slow shutter can spoil a great sighting, and shutter lag only makes timing feel tougher.
Use the Right Aperture for Sharp Birds
After locking in a fast shutter speed, you need an aperture that keeps feather detail crisp without starving your camera of light.
You’ll often get the best balance at f/5.6 to f/7.1, where your bird stays sharp but you can still hold the speed you require. Should you open too wide, you might lose depth on the bird, and should you stop down too much, you’ll force your ISO higher than you’d prefer.
Aperture For Feather Detail
How wide should you open your aperture in case you want crisp feather detail without losing parts of the bird to blur? Start with a wide aperture, but don’t go too wide. In our birding community, f/6.3 or f/7.1 often gives you the sweet spot. You keep strong feather texture, yet avoid melting the eye, beak, or wing edges out of focus.
That matters because depth isolation looks beautiful, but birds aren’t flat subjects. Their head, chest, and wing plane can sit at different distances.
Balance Sharpness And Light
While a wide aperture helps you separate the bird from the background, the real goal is to balance sharp detail with enough light to keep your shutter speed high. That sweet spot often sits around f/6.3 or f/7.1, where you get crisp feathers without starving the sensor.
In case the bird stays still, you can lean toward f/8 for added detail.
As light changes, you’ll adjust aperture with exposure balance in mind. Open up whenever the bird moves fast and you need 1/2000 second or more. Stop down a little when you want more of the head and body sharp.
Good light metering helps you protect bright feathers and dark shadows, too. With practice, you’ll feel this tradeoff quickly, and that’s at which point bird photography starts to feel like home for you outdoors.
Turn On Continuous Autofocus for Birds
At the moment birds shift, hop, or burst into flight, you need continuous autofocus turned on so your camera keeps tracking them instead of locking focus once and falling behind. That setting is called AI Servo or AF-C on most cameras, and it helps you stay ready alongside the flock, not a step behind.
If you’ve tried manual focus or single autofocus, you’ve felt how quickly a sharp shot can slip away. Continuous autofocus fixes that as it adjusts focus whilst the bird moves toward you, away from you, or across the frame.
For even better control, use back-button focus with AF-ON. Hold it to track, then release it at the moment you want to lock focus and reframe. Aim for the eye when you can. That’s where connection lives in every strong bird portrait.
Choose the Best AF Area Mode for Birds
Once a bird darts across the frame, your AF area mode decides whether your camera grabs the bird or jumps to the branches behind it. That choice matters, especially once you want more keepers and less frustration.
For perched birds, start with single point. You place focus exactly where it counts, usually on the eye, and you stay in control.
Whenever birds move unpredictably, switch to adaptive area. Your selected point starts the lock, then nearby points help in case the bird slips off center. That gives you breathing room without handing everything to the background.
Provided the background is clean, adaptive area feels like a teammate. Otherwise it’s busy, single point often saves you.
As you practice, you’ll feel which mode fits the moment, and that confidence becomes part of your rhythm.
Raise ISO for Bird Photography Safely
Because birds move fast and light changes even faster, you can’t treat ISO like a setting to fear. You use it to protect shutter speed once clouds roll in or a bird turns toward shade.
Higher ISO raises sensor sensitivity, letting you keep 1/1600 or faster without sacrificing the shot.
- Start low, then lift ISO only as light drops.
- Aim around ISO 500 to 640 for a safer 1/2000 second.
- Trust modern cameras, since ISO 3200 or even 6400 can still look strong.
- Clean files later with gentle noise reduction, not heavy smearing.
That balance helps you stay in the moment and come home with sharp frames.
You’re not failing upon raising ISO. You’re making a smart field choice, like bird photographers do together, with confidence and a little grit.
Use Burst Mode for Better Bird Photos
At the moment a bird lifts off without warning, burst mode gives you a real edge through capturing a quick series of frames instead of leaving everything to one perfectly timed press. You stay in the action, and that helps you feel like part of the rhythm bird photographers chase.
As the bird twists, flaps, or lands, each frame gives you another chance for sharp eyes, open wings, and better posture. Pair burst mode with steady panning and camera stabilization, and you’ll keep more usable shots.
Then, in case bright feathers trick your meter, quick exposure compensation helps protect detail across the sequence. Burst mode also works beautifully with continuous autofocus, because your camera keeps tracking while you follow the bird. Some frames will miss, sure, but that’s normal. The keeper is often hiding one click later.
Adjust Bird Camera Settings for Low Light
As soon as light drops, you have to protect shutter speed initially, because birds still move fast even as the scene looks calm. Keep 1/1600 second whenever possible, and stay near 1/2000 for flight. Then open your aperture wide and raise ISO without fear. You’re not failing in case noise appears. You’re doing what bird photographers do.
- Choose smart lens selection, because faster lenses help you keep shutter speed.
- Use AI-Servo or AF-C so focus keeps tracking through dim, changing light.
- Turn on image stabilization for perched birds, but bear in mind it won’t freeze wingbeats.
- Let ISO climb as needed, especially once backgrounds darken and action suddenly starts.
That balance helps you stay confident in the field. You belong with the photographers who adapt fast, trust their settings, and come home with sharp frames.
Frequently Asked Questions
How Close Should I Get Without Disturbing Wild Birds?
Approach only until the bird stays relaxed, then step back at the first sign of stress, such as alarm calls, freezing, or flying off. Keeping that distance protects the bird and lets it continue feeding, resting, or caring for young.
What Lens Focal Length Works Best for Bird Photography?
For bird photography, telephoto lenses in the 300 to 600mm range usually give the strongest results. Prime lenses often deliver cleaner detail when extra reach matters. A 400mm or 500mm lens is a practical starting point for outdoor shooting.
Should I Shoot RAW or JPEG for Bird Photos?
Choose RAW for bird photos if you want the most detail and more control when editing exposure, color, and shadows. JPEG is useful when you need smaller files, faster bursts, or quick sharing straight from the camera. RAW is usually the better starting point for bird photography because birds often move fast and lighting can change quickly.
How Do I Photograph Birds Ethically at Nests?
Photograph birds at nests by staying far enough away that adults continue normal care, moving slowly, and watching for alarm calls, frozen posture, or repeated departures. Do not remain for long periods, cut vegetation, or use food to draw birds in. Skip flash, choose a long lens, and leave immediately if the adults hesitate to return or begin acting differently.
What Weather Conditions Are Best for Bird Photography?
For the strongest bird photos, shoot under overcast skies or during golden hour, when light is even and manageable. Calm wind, light mist, and the period just after rain also create reliable conditions for clear, detailed images.
