
Light metering is the camera’s way of reading brightness in a scene. It helps you choose shutter speed, aperture, and ISO with less guesswork. A meter scale shows whether your photo will look too dark, too bright, or close to balanced. With a clear view of metering modes and exposure compensation, tricky lighting starts to make a lot more sense.
What Is Light Metering in Photography?
What exactly is light metering in photography? It’s the way you measure light so your photo looks balanced, not too dark or too bright. You use it to choose settings that work together, like shutter speed, aperture, and ISO. Once the reading sits near zero, you’re usually in a good place.
That matters because you want your images to match what you saw and felt. Light metering gives you a trusted starting point, whether you use film meters, handheld systems, or a simple app. It helps you read bright windows, soft shade, and tricky contrast with more confidence.
As you practice, you’ll feel more connected to the craft and to other photographers who learn through testing, adjusting, and getting it right, one frame at a time, together.
How Does Your Camera Meter Light?
Your camera uses a built-in metering sensor to read the brightness in your scene and help you choose exposure settings. It does this through measuring reflective light, which means it judges the light bouncing off your subject and into the lens.
Once you understand that, you’ll see why very bright or very dark subjects can trick your meter and why your settings sometimes need a quick fix.
Metering Sensor Basics
A camera meters light through using tiny light-sensitive sensors inside the body to read how bright the scene looks through the lens. These sensors help your camera decide exposure settings, so you can feel more confident every time you shoot. Different sensor types collect brightness data in slightly different ways, but they all serve the same goal: helping you make images that feel right.
Just as crucial, metering placement affects what part of the frame gets the most attention. Some cameras place metering areas across the frame, while others highlight the center or a tiny selected point. That placement changes how your camera judges brightness before you press the shutter.
Once you understand where the camera is reading light, you’ll feel more in control, less confused, and much more at home with your camera.
Reflective Light Measurement
Consider your camera like a careful observer: it measures light through reading the brightness that bounces off the scene and comes through the lens. That’s reflective metering, and it’s how most built in meters guide you. Your camera studies tones, then suggests exposure settings that aim for a balanced result you can trust.
Because it reads bounced light, reflective surfaces can fool it. Snow, glass, or a white shirt might look too bright, so your camera might darken the photo. Dark walls or black clothing can cause the opposite.
Lighting angles matter too, since side light, backlight, and glare change what the meter sees. As you practice, you’ll learn once to add or reduce exposure. That growing instinct helps you feel more connected, confident, and at home behind the camera.
How to Read the Metering Scale
Whenever you look at the metering scale, regard it as a simple guide that tells you whether your photo is too dark, too bright, or right on target. On your meter scale, zero means the reading is balanced.
Should the marker move left into negative numbers, the scene reads dark. Should it moves right into positive numbers, it reads bright. That clear layout helps you feel at home with your camera fast.
As you practice, read the scale beside your exposure index and notice how the indicator shifts with each scene. In most cameras, the center mark is your visual checkpoint.
Numbers like -2, -1, +1, and +2 show distance from that center. Consider it like a friendly map. You don’t need to guess. You just follow the pointer and learn the language together.
How Metering Affects Exposure
Metering shapes how bright or dark your photo looks because it guides your camera’s exposure choices. Whenever you read light accurately, you can set shutter speed, aperture, and ISO with more confidence and keep key details where you want them.
In case the scene fools the meter, exposure compensation helps you quickly brighten or darken the image without losing control.
Metering And Brightness
Although exposure can feel confusing at initially, your light meter gives you a clear way to judge brightness and choose settings that fit the scene. It helps you see how ambient brightness influences your photo before you press the shutter.
At the moment metering sensitivity responds to stronger or weaker light, you can adjust aperture, shutter speed, or ISO with more confidence.
As you practice, it will become apparent that brighter scenes can push exposure too far, while darker scenes can pull it down. Your meter shows that balance, so you don’t have to guess or feel left out of the process.
Instead, you become part of what photographers do every day: matching camera settings to the light in front of you. That’s where brightness and exposure connect, and it’s where your control starts to feel natural.
Reading Light Accurately
Because your meter translates light into clear exposure guidance, it helps you turn a bright or tricky scene into settings you can trust. Whenever you read it well, you stay in control and feel more at home with your camera.
A centered reading points you toward balanced exposure, while shifts above or below zero show how scene brightness changes your result. Good meter calibration keeps those readings dependable, especially whenever light changes fast.
- Use reflective metering whenever your camera reads light bouncing off the scene.
- Use incident metering whenever you want the light falling on your subject.
- Check the scale often so your ambient adjustments stay intentional.
- Match ISO and mode carefully to keep readings consistent.
As you practice, your choices feel less random and more like part of your creative team.
Exposure Compensation Effects
Whenever you use exposure compensation, you tell the camera to shift away from what its meter believes is neutral and move the photo brighter or darker on purpose. That matters because your meter wants middle tones, even though the scene doesn’t fit that average.
Assuming snow looks gray or a black shirt looks washed out, you can add or subtract exposure bias to protect the mood you saw.
From there, metering and compensation work as a team. You brighten faces in backlight with plus compensation, or hold highlight detail with minus compensation. In flash scenes, compensation can also influence flash output, depending on your settings and system.
As you practice, you’ll feel more in control, not lost. You’re learning how to guide the camera, and that confidence helps you feel right at home behind it.
What Are the Main Metering Modes?
How do you tell your camera which part of a scene matters most? You choose a metering mode. Each one helps you join the flow of photographers who read light with confidence.
Most cameras use reflective metering, but incident metering reads the light falling on your subject instead.
- Matrix metering checks the whole frame for a balanced reading
- Center-weighted metering favors the middle, which helps whenever your subject stays central
- Spot metering reads a tiny area for tight control in tricky contrast
- Incident metering uses a handheld meter for direct light readings
These modes connect to how you shoot. Matrix works broadly, center-weighted feels steady, and spot gets precise.
As you practice, these options start feeling less like buttons and more like trusted teammates beside you every shoot.
Which Metering Mode Is Best for Beginners?
For most beginners, matrix or evaluative metering is the best place to start because it reads the whole frame and gives you a balanced exposure in many everyday scenes. It helps you feel confident fast, especially while you’re still learning how light behaves across a photo.
In case your camera offers basic evaluative mode, you’ll usually get reliable results without stopping to ponder too much.
As you grow more comfortable, you’ll observe why many new photographers also like easy center weighted metering. It gives more importance to the middle of the frame, which can feel simple and familiar once your subject sits near center.
Still, in the event that you want one mode that helps you stay in the flow and get steady results with less stress, evaluative or matrix is the friendliest starting point for most beginners today.
When Should You Use Evaluative Metering?
Why does evaluative metering feel so easy to trust in everyday shooting? Because it reads the whole frame and helps you stay confident whenever the light changes fast. You should use it whenever you’re photographing a complex scene, like a street view, family gathering, or travel moment with variable lighting.
It works well whenever you want balance without stopping to meter each area yourself.
- You get reliable exposure in mixed light
- You can react faster to real moments
- You keep more attention on composition
- You feel more in step with your camera
That makes evaluative metering a great fit whenever you’re still building skills and want support. It also helps whenever your subject moves through sun and shade.
In those situations, your camera does smart background work, so you can stay present and keep shooting.
When Should You Use Center-Weighted Metering?
You should use center-weighted metering if your subject sits near the middle of the frame and the background is much brighter or darker.
It helps you expose for a face in a bright background, so your portrait doesn’t turn into a silhouette. It also works well whenever strong contrast surrounds a centered subject and you want the camera to care more about them than the edges.
Portraits With Bright Backgrounds
During your subject stands in front of a bright window, sky, or sunlit wall, center-weighted metering often gives you a safer starting point than full-frame evaluative modes. It tells your camera to care more about your subject’s face and less about the glowing area behind them. That helps you protect skin tones, improve highlight control, and keep the portrait feeling natural and welcoming.
- Your subject stays brighter and more readable
- Skin tones look more consistent
- You gain cleaner background separation
- You spend less time fixing exposure later
Because the meter favors the middle, you can expose for the person unless letting the background fool the camera. You’ll still want to check your histogram and adjust exposure compensation in case needed, but you’ll feel more confident, connected, and in control with every shot.
Centered Subjects In Contrast
During the moment your subject sits near the center of the frame and the scene has strong contrast, center-weighted metering often gives you a steadier, more trustworthy reading than full-frame modes. You want the camera to care most about the person or object that matters, not the bright sky or deep shadows at the edges.
That’s where this mode helps you feel in control. It reads the middle area initially, so your exposure stays closer to your subject. In turn, you get better contrast balance without fighting the background.
This works well for portraits, street scenes, stage moments, and backlit subjects. It also supports subject isolation, because your main focus gets the exposure attention it deserves. In case your frame’s center holds the story, center-weighted metering helps you capture it with confidence and a little less guesswork.
When Should You Use Spot Metering?
At what time does spot metering make the biggest difference? You’ll reach for it once one small part of your frame matters most. It helps you meter a face, a flower, or a bird with precise focus, even while the rest of the scene competes for attention.
In case your subject sits in high contrast, spot metering gives you more control and helps you feel confident with every shot.
- Meter a person’s face once the background pulls attention away
- Check a flower or bird whenever you want clean, careful exposure
- Isolate a key detail in portraits, wildlife, or stage moments
- Build trust in your settings during tricky, uneven light
Because it reads only a tiny area, spot metering works best once you know exactly what tone should guide your exposure choice in that moment.
How Metering Works in Bright Scenes
Provided a scene looks very bright, your camera’s meter still tries to turn it into a balanced middle tone, and that can make sunlit sand, snow, white walls, or backlit skies come out darker than your eyes expect. That’s normal, so you’re not doing anything wrong. You simply need a little positive exposure compensation to keep bright highlights looking clean and natural.
| Scene | Meter sees | You do |
|---|---|---|
| Snow | Too bright | Add exposure |
| Sand | Midtone target | Brighten slightly |
| White wall | Reflective glare | Check histogram |
As you practice, you’ll see why reflective metering gets fooled on shiny surfaces. In bright scenes, review your histogram, protect detail, and trust your judgment. You’re learning what every photographer in the community learns: meters help, but you guide the final exposure.
How Metering Works in Dark Scenes
While dark scenes look simple to your eyes, your camera’s reflective meter still tries to brighten them toward a middle tone, and that often makes night streets, black clothing, concert stages, or deep shadows look too bright and washed out.
In low light, you’ll often see your meter favor brightness over mood. That matters because your scene belongs in the dark. To keep exposure balance, watch how tones shift and check your histogram for real feedback.
- Spot meter a dark area to protect the scene’s natural feel
- Review shadow detail so blacks stay rich, not gray
- Raise ISO carefully for noise control whenever light is scarce
- Compare frames to learn how your camera reads darkness
As you practice, you’ll feel more at home reading dark scenes. Soon, your images will keep depth, atmosphere, and connection.
Exposure Compensation and Metering
Because your camera meter doesn’t always know what mood you want, exposure compensation lets you quickly tell it to make the image brighter or darker without leaving your current shooting mode. That matters whenever snow, sand, or backlight fools the meter into making everything look too gray. You’re not doing anything wrong. You’re learning the meter’s point of view.
Once you understand metering limits, you can use simple compensation strategies with confidence. Dial in plus compensation whenever bright scenes look dull. Use minus compensation whenever dark scenes turn washed out.
Then check your preview and histogram, and fine-tune should it be needed. This small adjustment helps your photos match what you felt in the moment. As you practice, you’ll trust yourself more, and that’s where you start feeling like you truly belong behind the camera.
How to Use Metering in Manual Mode
In Manual mode, you read the meter initially, then you adjust shutter speed, aperture, or ISO until the indicator moves toward zero.
In the event the meter sits on the plus side, your image is too bright, and in case it falls on the minus side, it’s too dark.
Once you get comfortable making those small changes, you’ll feel far more confident controlling exposure in any light.
Reading The Meter
Once you switch to Manual mode, the meter becomes your guide, and once you know how to read it, exposure feels far less confusing. You’re not guessing anymore. You’re reading a scale that shows how your camera sees light.
Once the indicator sits at zero, your exposure matches the camera’s meter calibration. In the event it moves to plus, the scene looks brighter than neutral. Supposing it falls to minus, it looks darker. That simple feedback helps you feel more confident and connected to your camera.
- Zero means the meter sees balanced light
- Plus values suggest a brighter result
- Minus values suggest a darker result
- Ambient adjustment matters in changing light
As you practice, you’ll start trusting the meter without feeling left out of the process. It becomes your steady teammate in tricky scenes.
Adjusting Exposure Settings
Now that you can read the meter scale, you can use it to shape the exposure instead of just watching it. In Manual mode, you stay in control, and that’s where many photographers begin to feel at home.
Once the meter sits below zero, add light. Slow the shutter, open the aperture, or raise ISO. When it climbs above zero, do the opposite.
Start with the setting that matters most for your photo. In case motion matters, consider shutter priority and set shutter speed initially. Then use aperture adjustment and ISO to move the meter where you want it.
Provided depth matters more, pick the aperture first, then balance shutter speed. Take a test shot, check the histogram, and refine. That simple loop helps you trust yourself and your camera together.
Common Metering Mistakes to Avoid
Although light meters are meant to make exposure easier, a few common mistakes can still throw you off and leave you questioning why your photo looks too bright, too dark, or just plain wrong. In case you’re learning, you aren’t alone. We all miss things initially, and that’s part of growing.
- Setting an incorrect ISO, so your meter and camera disagree
- Choosing the wrong metering mode for the scene
- Ignoring highlights in bright skies, windows, or shiny surfaces
- Trusting the meter without checking your histogram
These slip-ups matter because your meter reads light, not your artistic goal. So, slow down and match your settings carefully. Then, watch contrast and decide what matters most in the frame.
Whenever you practice this, you’ll feel more confident, more consistent, and more like you truly belong behind the camera.
Frequently Asked Questions
Do Smartphone Light Meter Apps Work Accurately Enough for Beginners?
Yes, smartphone light meter apps are accurate enough for beginners in many situations. The biggest advantage is ease of use, but phone sensors have limits, so it helps to check exposure with histograms and build skill through regular practice.
How Do Handheld Light Meters Differ From In-Camera Meters?
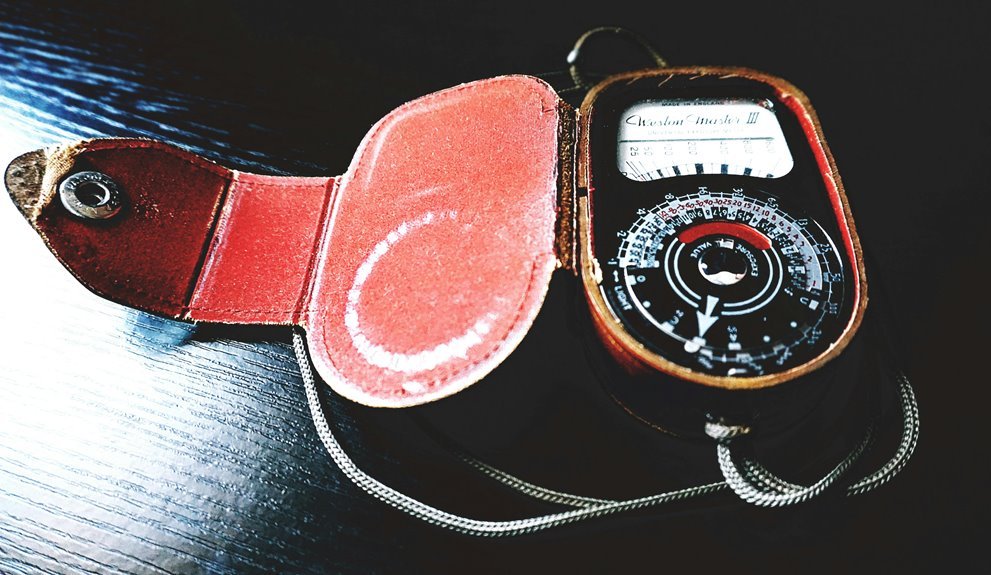
Handheld light meters measure light at the subject for more precise and repeatable exposure readings. In camera meters usually measure light reflected from the scene, which can change with different tones and backgrounds. Analog meters are also an option for photographers who prefer direct and reliable exposure control.
What Is the Sunny 16 Rule and When Is It Useful?
In bright sunlight, set the aperture to f/16 and choose a shutter speed close to the reciprocal of your ISO. This long used guideline gives a dependable daylight exposure estimate. Because direct sun commonly measures around EV 15, it works well when a light meter is unavailable or unreliable.
Should I Meter Differently When Shooting RAW Instead of JPEG?
No. Metering stays the same, but RAW gives you more room to adjust exposure afterward. It holds more image data, so you can preserve bright areas, lift darker tones, and use the histogram to judge exposure more accurately.
How Do You Meter Correctly When Using Flash or Studio Strobes?
Set your meter to flash mode, match the ISO to your camera, and place the meter at your subject facing the light or camera depending on what you want to measure. Confirm your shutter speed is at or below flash sync speed, fire the strobe, and use the meter reading to adjust aperture, flash power, or light position until you reach the exposure you want.