
Sharp portrait focus starts with the eyes. The eye closest to the camera usually needs to be the sharpest part of the photo. Eye AF can help, yet camera settings and steady technique still make the biggest difference. A few simple focus habits can turn soft portraits into clear, engaging images.
Focus on the Near Eye
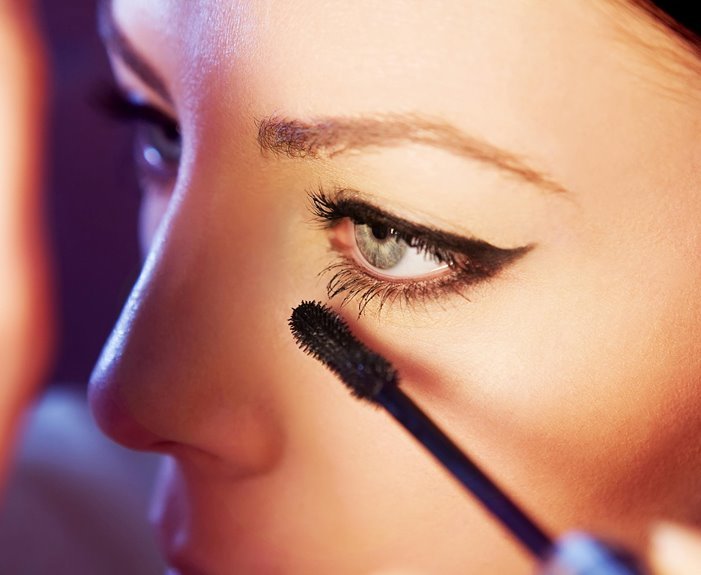
As soon as you want a portrait to look truly sharp, focus on the eye that’s closest to the camera initially. That near eye gives viewers a natural anchor, so the whole face feels crisp and inviting. Whenever you get focus placement right, your subject looks present, connected, and wonderfully real.
Because eye distance changes from one side of the face to the other, even a small miss can leave lashes soft and details uneven. That’s why careful focus placement matters so much in portraits. It also helps you control the depth effect, especially whenever you’re working with a blurred background.
Provided the near eye is sharp, the image feels welcoming and polished. You’re giving people the kind of portrait that helps them feel seen, and that always brings everyone closer together naturally.
Choose the Right AF Mode
The right AF mode can make portrait focus feel much easier, especially whenever your subject shifts, smiles, or leans even a little. In case your subject stays still, use single-point AF so you can place focus exactly where you want it.
That gives you more control and helps your portraits feel polished and dependable.
Once your subject moves, switch to continuous AF so your camera keeps adjusting with them. This helps you stay confident instead of fighting missed focus.
Be careful with zone focusing, though. It can grab a cheek, nose, or hair instead of the eye. Should your camera start guessing wrong, use manual override to fine-tune quickly. That way, you stay in charge while still working fast.
With the right mode, you’ll feel more connected and in sync with your subject.
Use Eye AF When It Helps
At the moment your subject shifts even a little, Eye AF can save you from the kind of near-miss that looks fine on the camera screen but falls apart later. Whenever you’re working with shallow depth of field, eye tracking helps you stay connected and consistent. It feels like having a quiet assistant beside you.
| When to use it | Why it helps |
|---|---|
| Small subject movement | Keeps eyes locked |
| Kids or candid portraits | Follows quick changes |
| Wide-aperture shots | Protects critical focus |
Still, don’t treat it like magic. Good autofocus calibration matters, especially in case focus seems slightly off again and again. If Eye AF starts grabbing lashes, glasses, or the wrong face, switch methods fast. You belong in control, and the best portraits happen whenever technology supports your instincts, not replaces them.
Raise Shutter Speed for Sharp Eyes
Even in the event that your focus is perfect, a slow shutter speed can still turn sharp eyes into a soft blur. That happens from your movement, your subject’s movement, or both. To stay in the safe zone, start with the inverse focal length rule. Should you be using 85mm, aim for at least 1/100. For portraits, many of us get cleaner results around 1/160, 1/200, or faster.
That extra margin speed gives you breathing room whenever hands shake, a child wiggles, or your subject laughs at the wrong moment. In case you’re shooting handheld, raise shutter speed before trusting luck.
In dim light, steady yourself, add light, or use a tripod so your shutter doesn’t dip too low. You’re not overdoing it. You’re protecting the eyes everyone connects with initially.
Use a Narrower Aperture for Sharp Eyes
Faster shutter speeds protect you from motion blur, but aperture decides how much of the face actually stays in focus.
Whenever you shoot wide open, one eye might look crisp while the lashes on the other eye drift soft. That can feel frustrating, especially whenever you want portraits that make people feel seen and connected.
Stabilize the Camera for Better Focus
Because sharp focus can still fall apart from the tiniest camera movement, stabilizing your camera is what helps all that careful eye focus and aperture work actually show up in the final photo. Whenever you’re handholding, tuck in your elbows, breathe slowly, and press the shutter gently. That small steadiness can make your portraits feel polished and confident.
Whenever light gets low, give yourself backup. A tripod takes your natural movement out of the shot and helps you stay consistent from frame to frame. To reduce tripod vibration, keep the legs sturdy and lower the height should wind pick up.
In case your camera has stabilization, turn it off on the tripod so it doesn’t create blur. Then use a remote shutter or self-timer, so your finger doesn’t shake the camera right at the moment.
Zoom In and Check Eye Sharpness
Once you’ve done the work to steady your camera, the next step is to zoom in on your preview and check the eyes before you move on. This quick habit helps you catch soft focus while your subject is still with you, so you don’t miss the shot everyone hoped for.
As you review, enlarge the image enough to see lashes and the iris clearly. In the event the nose looks crisp but the eyes don’t, refocus and try again. That’s where manual focusing can save you whenever autofocus hesitates.
In case your subject shifts, check both eyes, especially at wider apertures. You want them to feel seen, and sharp eyes help create that connection. In special cases, like group portraits with depth changes, focus stacking can help, but for most portraits, a careful zoom check keeps your work strong and trusted every single time.
Frequently Asked Questions
How Does Lighting Quality Affect Perceived Sharpness in Portrait Photography?
High quality light can make a portrait look sharper by defining facial features more clearly. Careful light direction and controlled shadow contrast help reveal detail in the eyes, reduce muddy tones, and produce cleaner edge definition.
Should Image Stabilization Stay on When Shooting Portraits on a Tripod?
No. If your camera is locked on a tripod for portraits, turn image stabilization off. On many systems, stabilization can create small movements when none are there, which softens detail instead of helping. For the cleanest files, disable it and let the tripod do the work.
How Do I Keep Multiple Subjects’ Eyes Sharp in Group Portraits?
Keep every subject’s eyes sharp by arranging faces so they sit on the same focal plane, choosing f 8 to f 11 for enough depth of field, placing focus on the eyes of someone near the front center, and using focus stacking if the group is spread across multiple distances.
When Should I Use Manual Focus Instead of Autofocus for Portraits?
Use manual focus when autofocus keeps searching in dim light, locks onto hair or glasses instead of the eye, or picks the wrong part of the face. It lets you place focus exactly where you want it and maintain steady control during the portrait.
How Can Lens Choice Affect Eye Sharpness in Portrait Photos?
Lens choice directly affects how sharp the eyes appear in a portrait. Focal length changes perspective and can make camera shake more or less noticeable, while aperture controls depth of field. For sharper eyes, use a lens that performs well at slightly narrower apertures so the eyes stay in clear focus.