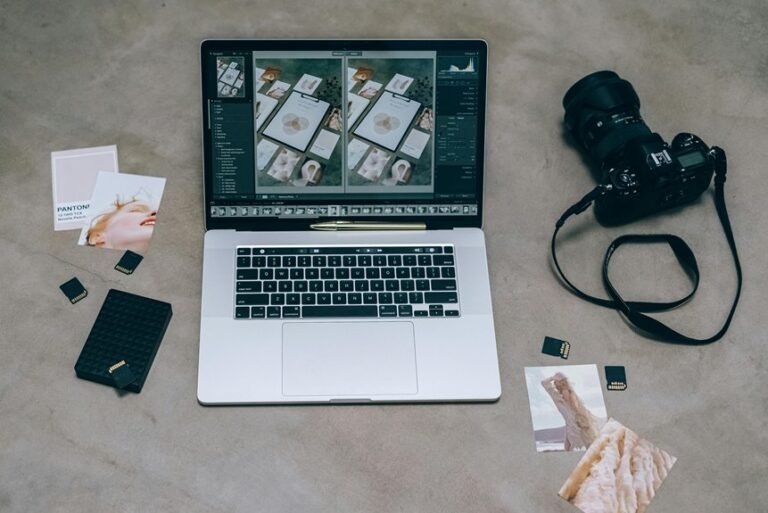

Focus peaking makes manual focus much easier by highlighting areas that look sharp. It works best with the right color, the right sensitivity, and a quick zoom-in check. It can speed up focusing in low light, macro shots, and shallow depth scenes. This article shares 10 simple tips to help you use focus peaking with more accuracy and confidence.
Turn On Focus Peaking Correctly
In case manual focus has ever felt a little frustrating, focus peaking can make it much easier right away. You’re not behind provided menus seem confusing at initially. Most cameras hide this tool in a shooting or focus section, so open your settings and activate menu options for manual focus aids.
Once it’s on, your camera places a focus indicator over the sharpest edges in the frame. That instant feedback helps you trust what you’re seeing, especially during you’re still building confidence.
Next, check the peaking sensitivity setting. Lower sensitivity gives you cleaner, more exact highlights, while higher sensitivity makes them easier to notice. In bright light, this tool often works best.
Then turn the focus ring slowly and watch the highlighted outlines settle onto your subject with more confidence and less guesswork.
Choose a Visible Peaking Color
Because peaking only helps once you can spot it fast, the color you choose matters just as much as turning the feature on. You want a highlight that jumps out right away, so your eye feels at home with the scene instead of hunting around for clues.
Start with matching peaking color to the background ahead of you. Red often stands out in green foliage, while yellow can work well against darker subjects. White might look clean, but it can disappear in bright skies or pale walls. That’s where color visibility and color contrast matter most.
In case your subject or scene changes, switch colors without hesitation. You’re not doing it wrong, you’re adapting like every confident photographer does. A visible peaking color helps you trust what you see and stay connected to the moment.
Set Peaking Sensitivity Carefully
You’ll get better results once your peaking sensitivity fits the amount of detail in your scene.
In case it’s set too high, too many edges light up, and that can make true focus harder to trust. So take a moment to test a few sensitivity levels, because a small change can make focusing feel much clearer and less frustrating.
Match Scene Detail
How do you keep focus peaking helpful instead of distracting? You match sensitivity to your subject’s scene texture. Fine bark, hair, and fabric create lots of peaking, so lower sensitivity helps you trust the real focus point. Smooth walls, skin, or foggy scenes need a higher setting so details still show. Consider regarding detail comparison: provided that everything sparkles, back it down; provided that nothing lights up, raise it a step. That way, you stay confident and connected to what other careful shooters do in the field.
| Scene | Best sensitivity | Why it helps |
|---|---|---|
| Hair | Low | Stops false sparkle |
| Brick | Low | Keeps edges honest |
| Skin | Medium | Balances subtle detail |
| Fog | High | Reveals weak contrast |
| Flowers | Medium | Protects petal detail |
You’ll feel more in control, not crowded by extra signals.
Avoid Excess Highlights
In case focus peaking is set too high, the screen can light up with so many colored edges that it stops helping and starts getting in your way. Once that happens, you might feel like you’re guessing instead of focusing, and that can shake your confidence.
To keep peaking useful, aim for selective highlighting rather than a blanket of color. You want only the truly sharp details to stand out, so your eye can trust what it sees.
Should the display feels busy, reduce brightness in the viewfinder or screen so the peaking color doesn’t overpower the scene. That small change can make fine detail easier to judge.
As you work, bear in mind you’re not trying to highlight everything. You’re trying to see the right thing clearly. That’s how you stay calm, connected, and in control behind the camera together.
Test Sensitivity Levels
Because focus peaking can look very different from one camera to the next, it helps to test the sensitivity levels before you trust what you see in a real shoot. Start with sensitivity calibration on a still subject, then shift to active testing with small movements, changing light, and busy backgrounds. That way, you’ll learn what your camera is really telling you, not what you hope it means.
| Setting | What you’ll see |
|---|---|
| Low sensitivity | Thin, precise outlines, like a clean pencil trace |
| High sensitivity | Bold shimmer spreading across edges, like glitter on details |
As you practice, you’ll feel more at home with your camera. In case highlights flood the frame, lower sensitivity. In the event they barely appear, raise it. You’re not guessing anymore. You’re building trust with your tools and joining the rhythm skilled shooters know.
Use Focus Peaking With Magnification
While focus peaking is helpful on its own, it gets much more reliable provided you pair it with magnification. Once you zoom into the scene, you can see the exact area that needs to snap into focus, not just a rough highlight. That gives you more confidence, especially when you’re working with shallow depth of field.
Set magnification to a custom button so it’s always close at hand. Then use live view to check the sensor’s real-time image on your LCD or EVF. Zoom in on eyes, textures, or fine edges, and turn the focus ring slowly until peaking appears clean and steady.
This combo helps you feel in control, like you’re working with the same careful rhythm other skilled shooters trust. It also makes manual focus feel less like guessing and more like teamwork.
Recognize When Focus Peaking Fails
Focus peaking isn’t perfect, and you’ll observe that initially in low-contrast scenes where edges don’t light up clearly.
You can also get fooled if bright areas sparkle with peaking highlights even though your real subject isn’t truly sharp.
And at wide apertures, your depth of field gets so thin that peaking might look right while focus is still slightly off where it matters most.
Low Contrast Scenes
In low contrast scenes, focus peaking can let you down because there aren’t enough clear edges for the camera to highlight. Soft fog, plain fabric, skin tones, and matte walls often confuse edge detection, so the peaking shimmer might appear weak, patchy, or missing.
When that happens, you haven’t failed. You’re seeing a limit of the tool, and every careful photographer runs into it.
To stay in control, look for tiny areas with stronger separation, like eyelashes, seams, or reflections. Should your camera allow contrast enhancing through image style or display settings, use it to reveal faint detail.
Then add focus magnification and check the exact spot that matters most. You can also pre-focus on a nearby object with clearer texture in the same plane. That way, you keep your rhythm and still come home with sharp frames.
Brightness Misleads Highlights
Bright light can trick focus peaking just as easily as low contrast can. Whenever ambient brightness is high, your camera might flash peaking on shiny edges that aren’t truly sharp. That can make you feel off, especially whenever you’re trying to trust what you see.
To stay confident, watch for these clues:
- Specular reflections often trigger peaking before real detail does.
- Bright skin, glass, metal, and water can create highlight artifacts.
- A slight camera angle change might remove false peaking instantly.
- Magnification helps you confirm texture, not just glowing outlines.
That matters because peaking reads contrast, and hard light creates fake contrast. Provided a sunlit edge lights up everywhere, pause and recheck with magnification or a small shift in framing.
You’re not missing something. You’re learning how your camera sees, and that’s how you join the photographers who nail manual focus.
Wide Aperture Limitations
Even though peaking looks solid, wide apertures like f/1.4 or f/1.8 can trick you because the sharp zone becomes so thin that the colored outline appears broader than the true plane of focus. That means your subject’s eyelashes might glow, yet the eye itself can still miss. Should you have felt that frustration, you aren’t alone.
To stay in control, pair peaking with magnification and check the exact detail you want sharp. Then turn the ring slowly, because tiny shifts matter more than you expect.
Bokeh challenges also make edges look clearer than they are, especially in portraits or close-ups. And while stopping down helps, go too far and aperture diffraction can soften fine detail. So trust peaking as a guide, not a promise.
That’s how you keep your shots sharp and feel confident with everyone else.
Adjust Focus Peaking for Your Subject
Because focus peaking doesn’t read every scene the same way, you’ll get better results as soon as you adjust it for the subject in front of you. That’s especially true whenever you’re using a manual lens, because your focusing technique needs to match what the camera can clearly highlight.
- Raise sensitivity provided your subject has soft edges, like fabric or fog.
- Lower it whenever strong contrast creates too many glowing outlines.
- Pick a peaking color that stands apart from your subject and background.
- Watch for key details, like eyes, edges, or texture, not every bright line.
As you practice, you’ll start to feel what works for portraits, products, or street scenes. That shared learning curve is part of the craft, and you’re not behind provided it takes time. Every subject teaches your eye something useful.
Fine-Tune Focus Peaking for Shallow Depth
Once you’re working with shallow depth of field, small focus errors show up fast, so your peaking settings need to be tighter.
You’ll usually get cleaner accuracy through lowering highlight sensitivity a bit, then picking a peaking color that stands out clearly against your subject and background. That way, you can trust what you see and make tiny focus changes with a lot more confidence.
Refine Highlight Sensitivity
Although focus peaking is meant to make manual focus easier, shallow depth of field can make the highlights feel jumpy or too generous, so the initial thing you’ll want to refine is sensitivity.
Start with lower peaking strength, because strong settings often sparkle across areas that aren’t truly sharp. That small change improves your sensitivity calibration and gives you a cleaner read.
- Lower sensitivity during shooting at f/1.4 or close-up distances.
- Raise it slightly only in case dim light hides useful edge detail.
- Watch for highlight balance on eyelashes, textures, or contrast lines.
- Turn the focus ring slowly and look for the tightest, steadiest shimmer.
As you settle into this, you’ll feel more in control. Your camera stops shouting, and starts whispering useful clues. That’s at which point manual focus begins to feel like it belongs in your hands.
Match Peaking Color
Once you’ve toned down peaking sensitivity, the next step is matching the peaking color to the scene, since the wrong color can hide the very detail you’re trying to confirm.
You’ll get better focus whenever the highlight stands apart from your subject and background.
In bright skies, white peaking can vanish, so try red or blue. In foliage, red often pops. Under warm indoor ambient lighting, yellow might blend too much, while blue stays clear. This is where color harmony matters. You want contrast, not a pretty match.
As you turn the focus ring, choose the color that lets edges glow cleanly without covering texture. That small change helps you trust what you see, especially with shallow depth of field. It’s a simple adjustment, and once you find your fit, manual focus feels more natural.
Use Focus Peaking for Video Shots
Because video focus can slip so easily, focus peaking gives you a calm, clear way to see what’s sharp before and throughout a shot. It helps you trust manual focus without feeling alone in the process, especially whenever your scene starts moving.
- Build peaking into your video workflow so checking sharpness feels natural, not rushed.
- Use it during shot planning to mark where your subject will pause, turn, or lean.
- Watch highlighted edges as a guide for gentle focus tracking whenever movement is predictable.
- Pair peaking with slow focus ring turns, so your pulls look smooth and confident.
As you keep rolling, peaking helps you stay connected to the moment and your footage. You’re not guessing. You’re reading the scene with more confidence, and that steady feeling shows up on screen for everyone watching.
Confirm Focus Before Reframing
Once you’ve nailed focus, pause for a quick check before you reframe, since shifting the camera can quietly move your focus point without you noticing. Even a small tilt can pull attention off your subject’s eyes or main detail. So stay with the scene for one extra second and confirm those peaking highlights are still where you want them.
This matters even more whenever depth of field is thin. Should you use rocking focus, settle your body initially, then recheck before changing composition. Should you prefer zone focusing, make sure your subject still sits inside that sharp distance range after you move.
In moments like these, that quick confirmation helps you feel in control, connected, and ready to make frames that look as steady and intentional as you envisioned them.
Avoid Common Focus Peaking Mistakes
Even though focus peaking can feel like a cheat code initially, it’s easy to trust those bright outlines a little too much. You’re not alone should that happen.
Peaking helps, but it can mislead you whenever contrast is low or lighting conditions shift fast. That’s why your camera community leans on a few habits that keep focus honest.
- Don’t use high peaking sensitivity for every scene. It can exaggerate sharpness.
- Check focus with magnification, especially on eyes, textures, and close subjects.
- Pay attention to ring calibration, because a poorly matched focus throw can fool you.
- Watch edges near bright highlights, where peaking often flares on the wrong detail.
As you build confidence, you’ll start reading peaking as a guide, not a promise. That small mindset shift keeps your shots consistently sharp.
Frequently Asked Questions
Can Focus Peaking Drain Battery Faster During Long Shoots?
Yes, focus peaking can use more battery during long shoots because the camera keeps analyzing contrast edges and drawing highlight overlays in real time. To reduce the drain, lower screen brightness, limit magnified view when you do not need it, and keep a spare battery ready for extended sessions.
Does Focus Peaking Work Through Adapted Vintage Manual Lenses?
Yes, focus peaking works with adapted vintage manual lenses if your camera provides focus peaking from the sensor. It outlines areas of strongest contrast, so you can still confirm focus even when the lens has no electronic contacts. Results depend on the adapter, the lens, and the amount of available light, but many vintage lenses work well.
How Does Sensor Resolution Affect Focus Peaking Accuracy?
Higher sensor resolution usually makes focus peaking more dependable because greater pixel density helps the camera detect edges more precisely and show subtle contrast changes. Magnification still helps, and careful sensitivity settings matter, but using both together is a well established approach.
Can External Monitors Display Focus Peaking More Clearly?
Yes. Many creators find focus peaking easier to see on an external monitor because a 5 to 7 inch screen makes highlighted edges more visible. Accuracy improves further when the monitor is properly calibrated, bright enough for the environment, and used with magnification.
Is Focus Peaking Reliable When Shooting Through Filters?
Focus peaking usually works through filters, but its accuracy can drop with certain types. Strong ND filters, diffusion filters, or anything that lowers contrast can make the peaking highlights less dependable. Color shifting filters can also affect what you see. For more confidence, use magnified focus assist along with peaking, which is how many camera operators double check critical focus.