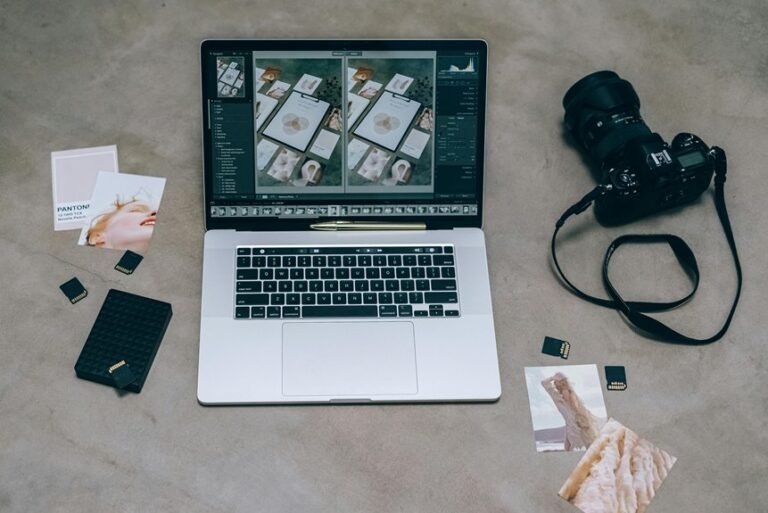

Organizing photos speeds up editing by cutting clutter and making every file easier to find. A simple workflow helps you sort images, flag keepers, and move through edits with less hesitation. Start with folders by date and shoot type, rename files during import, and save a backup right away. With that routine in place, editing feels smoother, faster, and far less messy.
Create a Repeatable Photo Organization Workflow
Once you create a repeatable photo organization workflow, you stop wasting energy on the same messy decisions every time and start moving through each shoot with calm, clear steps. You feel more in control, and that confidence helps you stay connected to your creative rhythm.
Start upon importing every session the same way, with clear names and dates. Then use standardized tagging so your best images, client picks, and priority edits always stand out. As your library grows, automated sorting helps you place similar files together without second guessing. That matters because less searching means more time creating.
Next, build a simple review path so you know what to check initially, what to flag subsequently, and what can wait. Whenever your process feels familiar, you work faster and feel like you truly belong in it.
Choose One Photo Folder Structure
To keep your photo library easy to manage, choose one folder structure and stick with it each time.
A date-based system gives you a clear path to every shoot, and consistent naming rules make each folder easy to spot at a glance. Whenever you use both together, you save yourself stress later and make finding photos feel simple instead of chaotic.
Date-Based Folder System
In case you want your photo library to feel calm instead of chaotic, a date-based folder system gives you one clear path from the moment you import your images. You always know where each shoot belongs, so you spend less time searching and more time editing with confidence.
Start with a simple folder hierarchy according to year, then month, then shoot date. That structure feels familiar fast, and it helps you stay connected to your work instead of buried underneath it.
Add timestamp labeling to image groups whenever you shoot multiple sessions in one day, and you’ll spot the right set right away. Because every import follows the same pattern, your library grows in a way that feels steady, welcoming, and easy to trust.
It’s like giving every photo a home, and yourself some breathing room.
Consistent Naming Rules
A date-based folder system gives your library a solid backbone, and consistent naming rules make that backbone easy to read at a glance.
Whenever you choose one photo folder structure and stick to clear filename conventions, you create order you can trust.
That trust matters during busy edits. You won’t feel lost, and your future self will thank you. Use the same pattern every time, such as client-name_event_sequence or YYYYMMDD_location_subject. Keep words short, useful, and easy for your team or family to understand. That’s how naming consistency helps everyone stay on the same page.
As your library grows, strong rules save time in search, sorting, backups, and delivery. You spend less energy guessing and more time editing. Even on messy days, your files feel like they belong, right where they should.
Organize Photos by Date and Shoot Type
Once you sort photos based on date and shoot type immediately after import, you might make the whole editing process feel lighter and far less messy. You know where each session belongs, and that sense of order helps you feel in control. With clear shoot categorization and date tagging, you can move from weddings to portraits to brand sessions without second guessing yourself. That structure keeps your creative rhythm steady.
| Date | Shoot Type |
|---|---|
| April 12 | Spring wedding |
| April 18 | Studio portraits |
| Could 2 | Family session |
Picture opening your folders and instantly spotting the right story, like joining a team that already has a playbook. You waste less time hunting, avoid mix-ups, and stay connected to the flow of each shoot. Your edits start faster, and your workspace feels welcoming too.
Rename Photo Files During Import
Start renaming your photo files during import, and you’ll save yourself from a surprising amount of stress later. Instead of digging through IMG_4821 and IMG_4822, you can label files with the shoot date, client name, or session type right away. That small step helps you feel in control and keeps your library easy to trust.
As your catalog grows, clear names help you find images fast and stay connected to your own system. You won’t waste time guessing which folder holds a family session or branded shoot. Better yet, import presets can apply your naming setup automatically, so you don’t have to consider it every time.
In case you want more structure, use custom templates to build names that match how you work. Soon, your files will feel organized, familiar, and ready for editing.
Back Up Photos Right Away
Protect your photos the moment they land on your computer, because nothing feels worse than losing a shoot before you even begin sorting it. You work hard for every frame, so give your files a safe home from the start. Copy everything to your main drive, then make a second backup right away.
Next, build a simple safety routine you can trust every time. Use cloud storage for quick protection and easy access whenever you’re away from your desk.
Then save another copy to offsite drives, so your photos stay safe even in case your computer fails or something happens at home. This step keeps your workflow calm and your mind clear. You won’t feel behind, and you won’t feel alone either.
You’re creating a system that supports your work and protects your creative community too.
Rate and Flag Photos Before Editing
Before you edit, rate and flag your photos fast so you don’t waste time on shots you won’t keep.
You can sort the best images initially, cut a huge batch down to your strongest picks, and make the whole job feel lighter.
In case you use the same rating system every time, you’ll stay organized, trust your choices, and move through editing with less stress.
Fast Culling Workflow
Once you cull fast, you save yourself hours later, and that relief matters whenever you’re staring at a huge shoot. Start with image triage, not editing. You’re simply sorting keepers from maybes and clear rejects, so your brain stays calm and your workflow feels doable.
Next, move through the gallery in one direction and use quick rating or flag shortcuts. Don’t zoom in unless focus looks questionable.
For large sets, use separate culling software provided it feels faster than your editor. That keeps momentum on your side.
Should the job allow it, invite client selection through a proof gallery, so you’re not guessing what matters most to them. You’ll feel more in sync with your clients, and your final edit list will be lighter, clearer, and easier to trust every time.
Prioritize Best Shots
After your quick cull, the next job is to mark the true standouts so you don’t waste editing time on photos that were never your strongest picks. This step gives your workflow direction and helps you feel confident instead of buried in choices.
Start your image triage through scanning for strong expression, sharp focus, clean composition, and real story. Then flag the frames that instantly feel like keepers.
In case you’re moving through a large set, use quick shortcuts so the process stays light and steady. Your goal is to select priority images initially, not to polish anything yet. That small shift saves hours later. It also helps you stay connected to the heart of the shoot, because you’re choosing the photos your people will most likely love, share, and bear in mind together for years.
Use Consistent Ratings
As you move from picking standouts to preparing for edits, a clear rating system keeps your gallery calm and easy to trust. Whenever you rate and flag before editing, you stop second-guessing yourself later. You create a shared language with your future self, and that feels steady.
Start simple. Give obvious keepers one star, strong options two, and final edits three or more. Use a rating shortcut in Lightroom so your hands stay fast and your focus stays on the story. Then add flags for yes, no, and perhaps. This quick triage cuts big sets down before you touch sliders.
As a result, you protect energy for real editing decisions. Better still, your final set holds stronger color consistency because you edit matched images together, not random frames pulled from chaos afterward.
Delete Duplicate Photos Without Overthinking
Start through giving yourself permission to delete near-identical shots fast, because keeping five versions of the same smile only slows you down and makes editing feel heavier than it needs to. You don’t need to protect every tiny variation. Trust your eye, pick the strongest frame, and let the rest go. That simple habit helps you feel more in control and less buried.
To make that easier, combine automated detection with quick visual comparison.
| In case you notice | Do this |
|---|---|
| Same pose, same light | Keep the sharpest one |
| Tiny expression change | Save the most natural look |
As you sort, zoom in for focus, then move on. Should two photos tell the same story, your gallery only needs one. You’re building a cleaner set that feels polished, confident, and easier for everyone to love.
Use Collections to Sort Photos Faster
Create a few smart Collections, and your photo library stops feeling like a giant junk drawer. You give each shoot a home, so you can find your best work fast and stay in rhythm.
That matters whenever you want your editing space to feel calm, familiar, and fully yours.
Next, build Collections around how you actually work. Make one for keepers, one for client selects, one for blog favorites, and one for images ready to edit.
Then let smart collections handle the updates for you. With flexible sorting, Lightroom pulls in files based on rules you choose, like star ratings or color labels. You won’t waste time dragging photos around manually.
Instead, you move through a system that supports you, keeps you connected to your process, and helps every session feel lighter.
Add Keywords to Organize Photos Later
Collections help you group a shoot in the moment, and keywords help you find those photos again months later without digging through folder after folder. At the point you add clear terms during import or right after culling, you build a system that feels easy to return to and share with your team.
- Use metadata tagging for people, places, and events.
- Build a keyword hierarchy, like Weddings > Ceremony > Vows.
- Keep words simple, consistent, and familiar to your workflow.
That small habit saves you from scrolling forever whenever a client asks for sunset portraits or family candids. It also helps you feel more organized, more confident, and more connected to your own archive.
You’re not just labeling files. You’re creating a photo library that welcomes you back and helps every future edit start faster.
Store Edited Photos Separately
Once your selects are edited, keep those finished files in a separate folder or export location so you don’t mix polished images with raw originals later. This simple habit helps you stay calm, confident, and part of a smooth workflow that feels easy to trust.
From there, name folders clearly according to shoot, client, or date, so everyone on your team can find the right images fast. Save final JPEGs in one place, and keep layered files somewhere safer, like external storage, as projects grow.
At the same time, use cloud archiving for delivered galleries and backup copies, so your hard work stays protected and easy to share. Once you separate edited photos, you spend less time second-guessing, avoid accidental re-exports, and create a system that makes you feel organized, reliable, and ready.
Frequently Asked Questions
How Can I Batch Edit Similar Photos Without Losing Consistency?
Edit one representative photo first, then copy those exact adjustments to the rest of the set to keep color and exposure aligned. After that, check each image for small lighting or framing differences, fine tune only what changes from shot to shot, and use a clear file naming pattern so the full series stays organized and consistent.
Which Lightroom Shortcuts Speed up Culling and Reviewing Images?
Use Lightroom shortcuts to cull faster by flagging photos, rating images, switching between Grid and Loupe, pressing backslash for before and after, and Alt clicking clipping warnings, keeping your workflow quick, precise, and in sync.
Should I Use Presets Before or After Basic Exposure Corrections?
Apply your preset at the start of editing, then fine tune exposure. This order gives you a clear starting point, keeps your look consistent across the gallery, and makes it easier to shape each image without drifting away from your style. It also helps you deliver a cohesive set of polished photos your clients will notice.
What Camera Settings Reduce Post-Processing and Editing Time Most?
The biggest time savers come from getting exposure, white balance, focus, horizon alignment, ISO, and picture profile right in camera. When these settings are accurate from the start, editing becomes faster and much lighter.
When Should Sharpening and Noise Reduction Be Applied in Workflow?
Apply sharpening only after your selected images are finalized, and leave noise reduction until the last stage. Start with batch global adjustments, then sharpen and reduce noise on the final keepers so the settings match the images you are actually delivering.