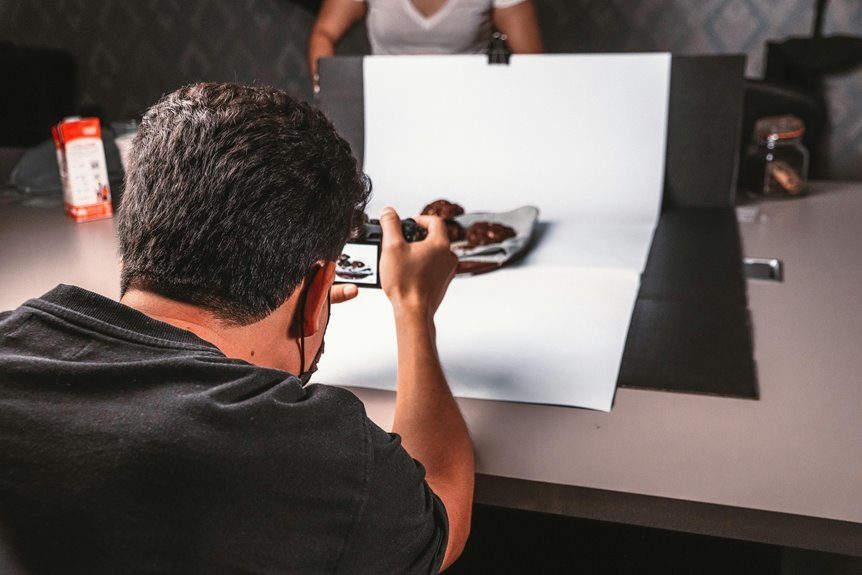

Crisp product photos at home come down to soft light, a steady setup, and a few smart camera moves. A bright window, tripod, and simple background can sharpen your shots fast. Small changes in angle and focus help show texture and clean edges. This guide shares 7 easy tips to help your photos look clear, polished, and real.
Use Soft Light for Sharp Product Photos
In the moment you want sharp product photos, soft light is your best friend because it brightens the item evenly and keeps harsh shadows from hiding vital details. You’ll get cleaner edges, truer color, and a look that feels welcoming, not cold or overly dramatic.
To create that effect, place your setup near a bright window and let diffused lighting do the heavy lifting. A sheer curtain, frosted panel, or light box softens direct sun so textures stay clear instead of crunchy.
Then guide light back into dim areas with natural reflectors like white foam board, poster board, or even a pale wall. This keeps labels, seams, and fine details visible. As you test shots, adjust the product and reflector position initially. More balanced light often fixes dull, murky photos faster than changing camera settings alone.
Stabilize Your Camera for Sharp Photos
Once your light looks good, keeping the camera still becomes the next step to getting crisp product photos. Even small movements can soften details, so you’ll want to cut camera shake before you press the shutter. A basic tripod helps right away, and good tripod stability makes each frame more reliable.
In case you’re part of a small home setup crew, you’re in good company. Set your tripod on a firm table or floor, then lock each leg and tighten the head. Use a 2 second timer so your hand doesn’t nudge the camera at the last second.
In the event your tripod feels light, place it carefully and avoid bumping the surface. Take a few frames without touching the camera between shots. That simple habit helps you get sharp, consistent images every time.
Set Focus and Exposure Manually
How do you make sure your product looks true in every shot? You take control of focus and light yourself. Auto settings can shift between frames, which makes your photos feel mismatched. Instead, tap or select the exact part of the product you want sharp, then keep it there.
In case your camera allows it, switch to manual focus for steady results, especially on small details like labels, stitching, or texture.
Next, set your brightness with manual aperture and exposure lock. A wider aperture can blur areas you need clear, so test a smaller setting whenever you want more of the product sharp.
Then use exposure lock to stop your camera from brightening or darkening each frame. That consistency helps your images look polished, trustworthy, and ready to fit right in with your brand.
Choose a Clean Product Photo Background
Your background should support your product, not compete with it. You can make that happen with seamless backdrops like white paper, neutral fabric, or a smooth poster board that keeps the frame clean and easy to read.
Whenever you remove extra clutter, colors, and busy patterns, your product stands out fast and looks more polished.
Seamless Backdrop Options
Because the background sets the tone for the whole photo, you’ll want a seamless option that looks clean, simple, and quiet behind the product. That choice helps your images feel polished and welcoming, like they belong with the brands you admire.
For an easy setup, use paper rolls for a smooth sweep from wall to table. They’re affordable, easy to cut, and great whenever you want a fresh surface fast. In case you need something tougher, vinyl sheets resist wrinkles, wipe clean, and stay reliable through repeat shoots.
You can also try poster board, foam board, or matte craft paper for small items. Keep colors soft and solid so your product feels at home. As soon as your backdrop flows without a hard line, your photos look more professional, and you’ll feel more confident sharing them.
Minimize Visual Distractions
While a styled set can add charm, a clean background keeps the product in control and stops the eye from wandering. You want people to notice what you’re selling, not the random mug, wrinkled cloth, or bright wall trying to steal the scene. Start with clutter removal, then choose a plain surface or soft texture that feels calm and welcoming.
Next, consider color harmony. Your background should support the product, not compete with it. Light items often stand out on deeper tones, while dark products look crisp on white or pale backdrops.
Keep patterns quiet, props few, and spacing generous. In case you add details, let them echo the product’s mood and colors. That way, your photos feel polished, consistent, and easy to trust, like they belong with the brands people already love.
Position Your Product to Show Detail
Once you place the product with care, small details become easier to see and the whole photo feels more polished. Start upon turning the item until its best features face the light. Then create angle variety, so viewers feel like they’re right there with you. Move the product away from the background for cleaner edges and better shadow placement. In case texture matters, tilt it slightly to catch light across the surface. You can also raise one side with a small prop to reveal depth without making the setup feel fussy.
| Position | What it shows | Best for |
|---|---|---|
| Straight on | Labels, shape | Packaging |
| Slight tilt | Texture, depth | Fabric, ceramics |
| Three quarter | Form, edges | Bottles, decor |
As you practice, your photos start feeling consistent, confident, and beautifully part of your brand story.
Edit for Sharpness Without Looking Fake
After you’ve worked to capture clean detail in camera, editing helps you tighten sharpness without making the product look hard, crunchy, or oddly outlined. Start small. You’re aiming for natural sharpening, not a gritty, overdone edge that makes your setup feel less polished.
Zoom in, then zoom out often, so you judge the whole image, not just tiny pixels.
Next, guide the eye where it matters most. Use selective clarity on labels, seams, texture, or key features, while keeping backgrounds and soft shadows smooth. That balance helps your photo feel refined and welcoming, like it belongs with the rest of your brand.
In case highlights start to sparkle too much or edges glow, pull back. Gentle edits usually win. You want viewers to notice the product initially, not the editing behind it.
Avoid Mistakes That Soften Product Photos
Good editing can polish a sharp image, but it can’t fully rescue a soft one. To keep your photos crisp, start with stopping camera shake. Use a tripod, set a 2-second timer, and half-press to lock focus before shooting. Then protect detail with more light, not higher ISO, so your product stays clean and clear.
Next, watch the small setup errors that quietly blur your work. Provided your shutter speed drops too low, tiny movements soften edges. In case you shoot too wide open, only one slice of the product looks sharp. Also, overexposed highlights erase texture, and incorrect whitebalance makes surfaces look dull or off.
Keep your product a little away from the background, check each test shot, and take extras. That careful habit helps your photos feel polished and truly yours.
Frequently Asked Questions
How Many Photos Should I Take of Each Product?
Take 8 to 15 photos of each product so you have front, side, close up, and styled options, plus a few extras in case some images are soft or poorly lit. This gives you enough variety to pick the clearest shots, show important details, and keep your product photos aligned across the full collection.
Should I Shoot in RAW or JPEG for Product Photography?
Choose RAW for product photography. It gives you precise control over exposure, color, and white balance, which makes it easier to keep every product image accurate and consistent. JPEG saves space, but RAW preserves more image data for cleaner edits and more reliable results.
What Camera Settings Work Best for Small Products?
For small products, use an aperture between f/2.8 and f/8, a shutter speed around 1/60, and ISO 100 to 400 for clear detail and low noise. A tripod helps prevent blur, and precise focus keeps edges and textures crisp.
Do I Need a Light Box for Home Product Photography?
No, you do not need a light box. A bright window, white foam boards, and a simple reflector can produce clean, repeatable product photos at home without expensive gear.
How Can I Keep Product Photos Consistent Across Multiple Items?
Keep product photos consistent by using the same lighting, camera position, background, and framing for every item. Set one tripod height, keep equal spacing, and apply the same editing settings so the full collection looks unified.